Difference between revisions of "Tutorials:Sims 3 Custom Patterns/Multi Colour Patterns 1"
| (One intermediate revision by one user not shown) | |||
| Line 3: | Line 3: | ||
Creating patterns with multiple colours is usually quite a bit more complex than single-colour patterns. While it can range from fairly easy to somewhat challenging into downright enragingly difficult, I will try to go over some different options for how to do it, depending on the type and complexity of your pattern. | Creating patterns with multiple colours is usually quite a bit more complex than single-colour patterns. While it can range from fairly easy to somewhat challenging into downright enragingly difficult, I will try to go over some different options for how to do it, depending on the type and complexity of your pattern. | ||
| − | This first method works quite well on images that are only two or three colours, with a high contrast between the two, and very clean lines. | + | This first method works quite well on images that are only two or three colours, with a high contrast between the two, and very clean lines. For more complex images, you will probably have to do some vectors. |
| + | |||
===Source Image=== | ===Source Image=== | ||
| Line 24: | Line 25: | ||
| − | [[Image:CustomPattern-9a.jpg|right|300x300px]]In order to separate the areas of the image, we're going to have to make the different component colours contrast as much as possible with each other. Then, desaturate the image. In Photoshop, this is Image - Adjustments - Desaturate. This gives you the white of the design over a black background.<br clear="all" /> | + | [[Image:CustomPattern-9a.jpg|right|300x300px]]In order to separate the areas of the image, we're going to have to make the different component colours contrast as much as possible with each other. Then, desaturate the image. In Photoshop, this is Image - Adjustments - Desaturate. This gives you the white of the design over a black background. |
| + | |||
| + | Make sure to use the eyedropper tool on both the black and white to make sure they are pure black and white - not a little shifted toward grey. If they are, you'll need to increase the contrast or do the Levels thing again to ensure you have true black and true white.<br clear="all" /> | ||
Latest revision as of 11:20, 14 August 2009
Contents |
[edit] Multi-Colour Patterns - Simplest Method
Creating patterns with multiple colours is usually quite a bit more complex than single-colour patterns. While it can range from fairly easy to somewhat challenging into downright enragingly difficult, I will try to go over some different options for how to do it, depending on the type and complexity of your pattern.
This first method works quite well on images that are only two or three colours, with a high contrast between the two, and very clean lines. For more complex images, you will probably have to do some vectors.
[edit] Source Image
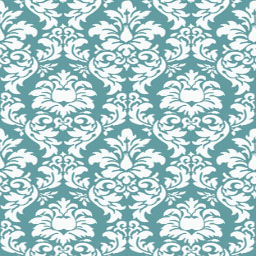
See my example at right, a teal and white. There's a lot of contrast, and each colour stands out very well against the background. This is an ideal pattern to convert this way.
[edit] Make Seamless & Resize
If your image is not already seamless, then now is the time to convert it to seamlessness. See: Tutorials:Seamless Textures for instructions.
Once your image is seamless, resize it to 256x256, the size used by the game's patterns. If you're using Photoshop, make sure to change your resize type to Bilinear for best results.
[edit] High Contrast
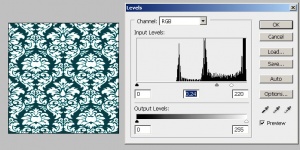
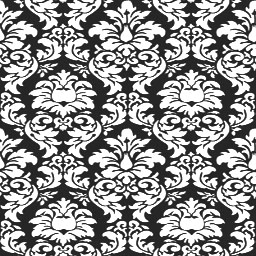
In order to separate the areas of the image, we're going to have to make the different component colours contrast as much as possible with each other.Now, there are several ways you can do this, but for two-colour patterns, the easiest is to fiddle with the levels. In Photoshop, this is Image - Adjustments - Levels. Then drag the two little sliders under Input Levels as close to each other as you can, under the black area. You want the lighter colour to stay as light as possible, and the darker colour to stay as dark as possible, without either one of them getting crunchy or icky looking.
Make sure to use the eyedropper tool on both the black and white to make sure they are pure black and white - not a little shifted toward grey. If they are, you'll need to increase the contrast or do the Levels thing again to ensure you have true black and true white.
[edit] Set Up Channels
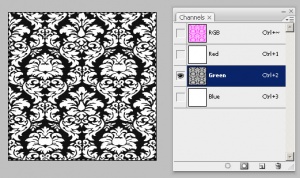
Once you have the black and white version of the design you would like, you can set up the channels for your pattern so that it will work properly in game.
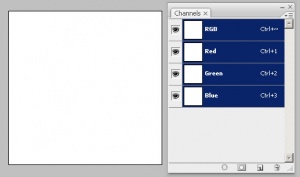
File - New and create a new document that's the same size as your texture - that is, 256x256 pixels. Leave your existing document open - it's just easier to do this in a new document than your existing one.Then, bring up the Channels window. In Photoshop, this is Window - Channels. You should see that all of the channels are blank, probably filled with white.
Then switch to the new, blank document.
Click on the Green channel in the Channels window, and Paste. This should paste the black and white image you just copied into the green channel, leaving the rest of the channels as they were.
