Difference between revisions of "Tutorial: Designer Rugs"
Adonispluto (Talk | contribs) m (→The Tutorial) |
|||
| Line 1: | Line 1: | ||
| + | {{TS3ModdingHeader}} | ||
==Introduction== | ==Introduction== | ||
| Line 291: | Line 292: | ||
Please direct any comments or questions [http://modthesims.info/showthread.php?t=418147 here]. Have fun! | Please direct any comments or questions [http://modthesims.info/showthread.php?t=418147 here]. Have fun! | ||
| + | |||
| + | {{TS3ModdingHeader}} | ||
| + | [[Category:Sims 3 Modding Tutorials]][[Category:Sims 3 Objects Tutorials]][[Category:Tutorials by cmomoney]] | ||
Latest revision as of 16:53, 17 September 2012
| Tutorials by Category | |
|---|---|
|
CAS | Patterns | Objects | Building | Worlds | Modding | Modding Reference |
[edit] Introduction
|
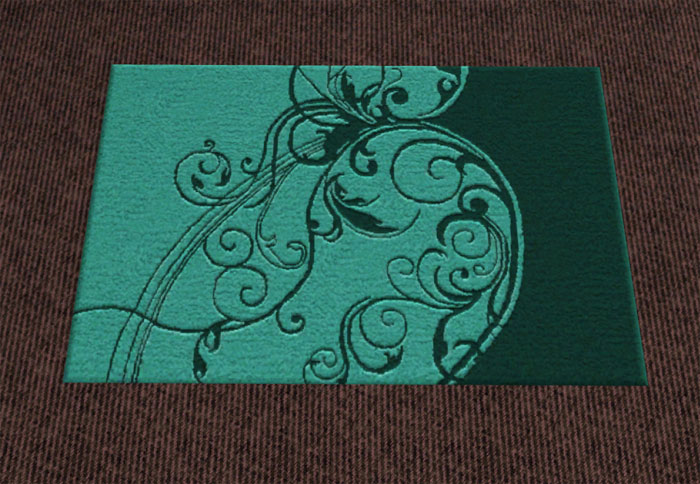
This tutorial will show you how to make better looking rugs for TS3(see examples). It will cover making the multiplier, creating a RGB mask, putting the images in s3pe, adding presets, and various texturing tips and tricks. I will be using Photoshop, but I believe the general methods will work in most graphic programs. I assume you know how to clone a .package.
[edit] What You Need
- S3PE
- 3x2Rug Template
- Graphic Editor (Photoshop, Gimp, ect.) and relative DDS plugins
- A nice image of a two-color rug(preferably with highly contrasted colors)
- A carpet texture ready for tiling
[edit] The Tutorial
Make a clone of the 3x2rugtemplate.package. Open it in s3pe and right click on the multiplier _IMG resource, select export and save it. Open Photoshop and let's get started!
[edit] Making the Multiplier
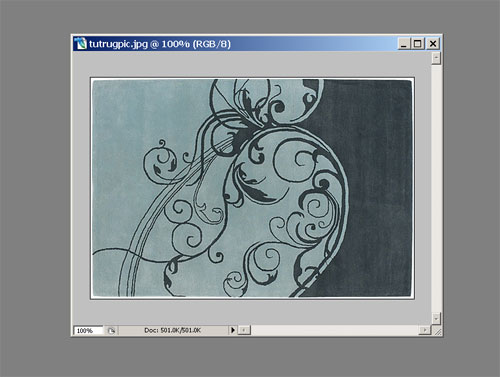
1. Open the pic of the rug you are trying to make.
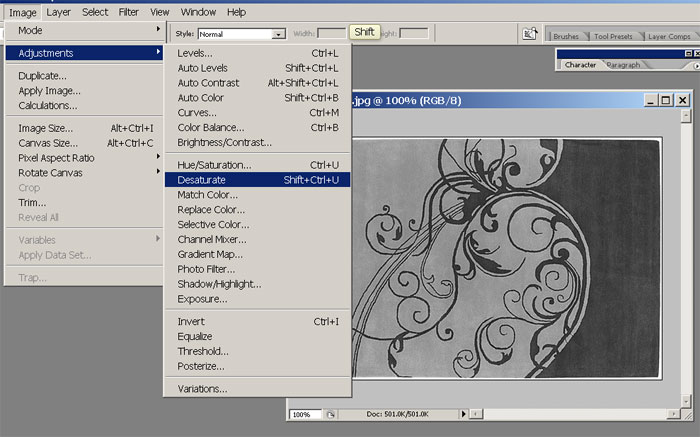
In the Image menu, choose Adjustments>Desaturate.
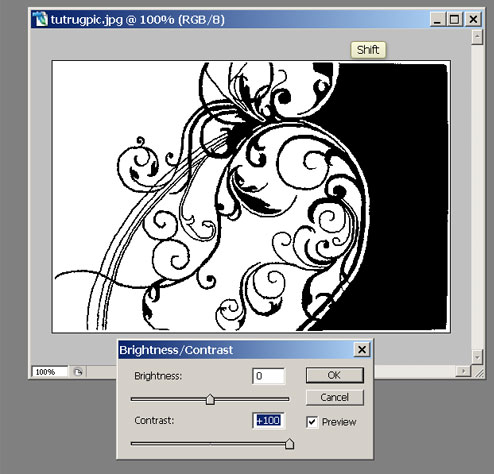
Again in the Image menu, choose Adjustments>Brightness/Contrast, and move the contrast slider up until your image is black and white. Select the rug and press CTRL+C to copy it.
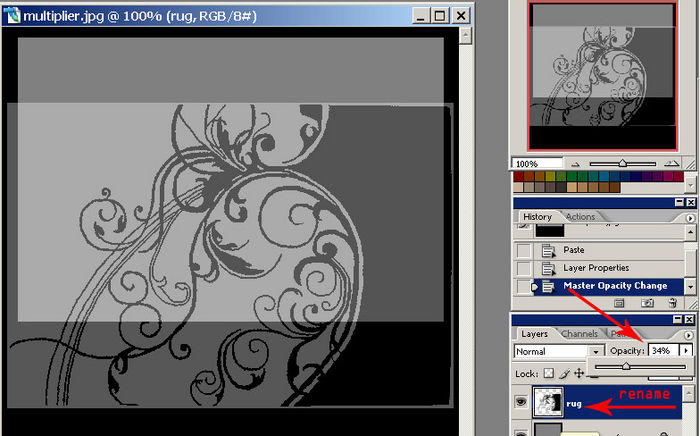
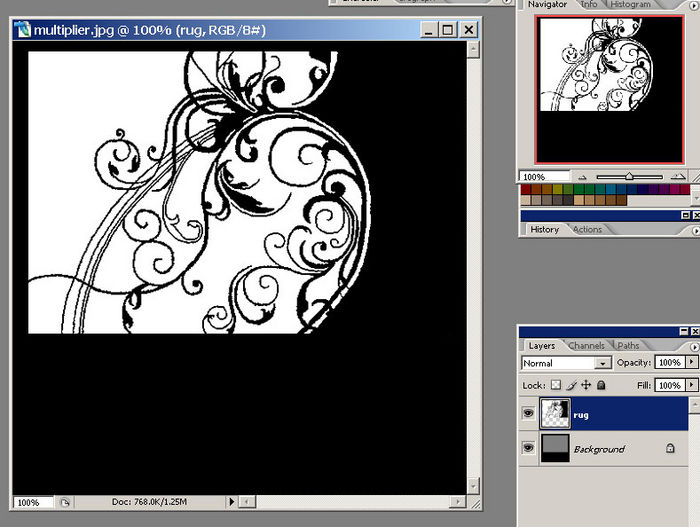
2. Open the multiplier image and press CTRL+V to paste the rug onto the multiplier, and rename the new layer to "rug". Change the opacity of the rug so you can see the gray area of the multiplier under it.
Press CTRL+T(free transform) and size the rug to fit the gray area. Return the rug layer's opacity to 100%. note: If your design goes outside of the gray area, you will need to trim off the excess. To do this you can select the background layer, select the gray area, invert your selection(CTRL+SHIFT+I), select the rug layer again and press delete.
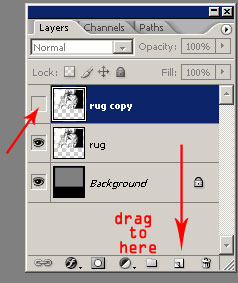
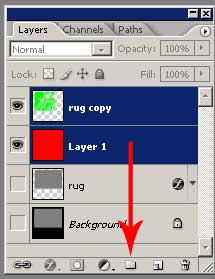
3. Click and drag the rug layer down to the New Layer button at the bottom of the layer pallete(looks like a page turning) to make a copy of the layer(or right-click and select duplicate layer). Click on the eye to hide the new layer.
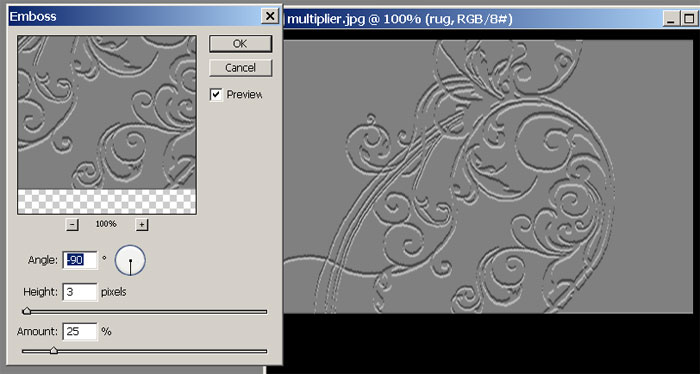
4. Go back to the rug layer, and go to Filter>Stylize>Emboss. In the Emboss dialogue, change the height to 3. The Amount depends on how dramatic you want the "raised" effect to be; I use around 25%. The Angle depends on what part you want raised/lowered: 90°=black is up, white is down; -90=white is up, black is down. Click OK.
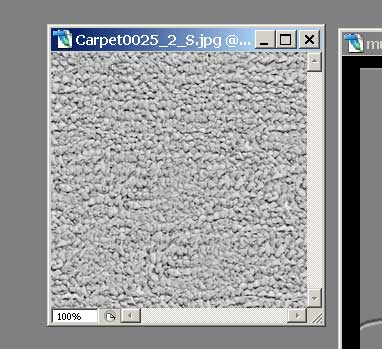
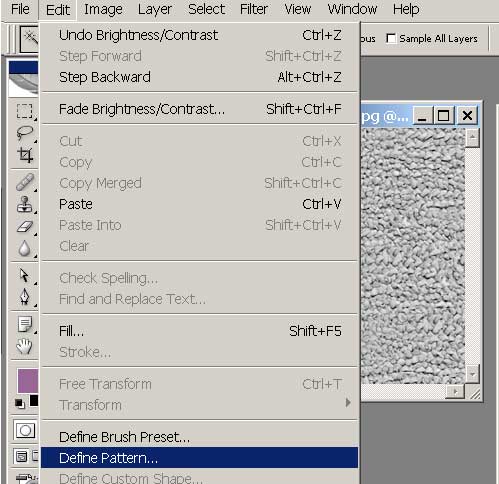
5. Open your carpet texture and desaturate it(as described in step 1). You may also want to adjust the contrast a little to make it more defined.
Then in the Edit menu, select Define Pattern. Name your pattern and click OK.
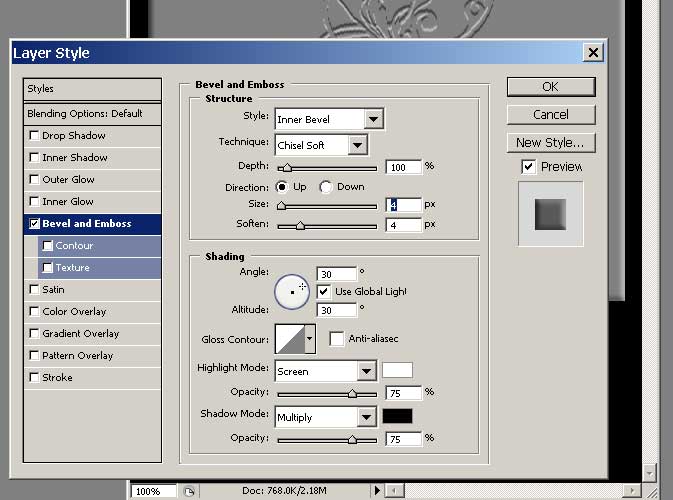
6. Go back to the multiplier, and double click on the rug layer to bring up the Blending Options. Select Bevel and Emboss and use these settings: Style: Inner Bevel Technique: Chisel Soft Depth: 100% Direction: Up Size: 4 Soften: 4
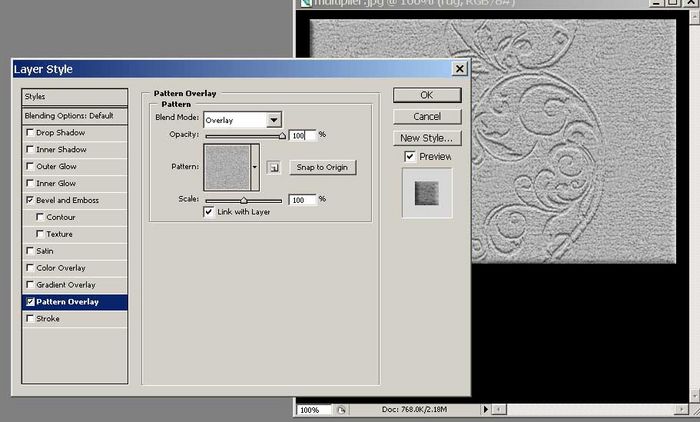
7. Still in Blending Options, select Pattern Overlay. Click the pattern drop-down list and select the carpet pattern(should be last). Change the scale to your liking(values like 100%, 50%, and 25% work best for me). Then change the Blend Mode to Overlay and click OK.
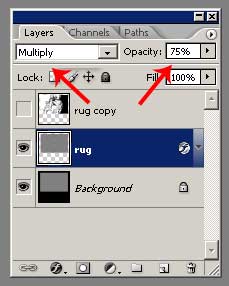
8. In the Layers Pallete, Change the rug layer's Blend mode to Multiply and the opacity to around 75%. Click the eye on both the background and rug layers to hide them.
[edit] Making the Mask
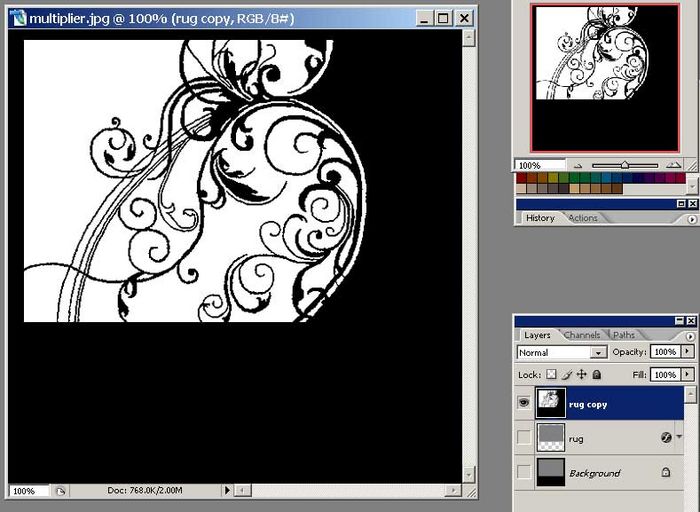
9. Select the copy of the rug layer you made. Bucket-fill the transparent area with black.
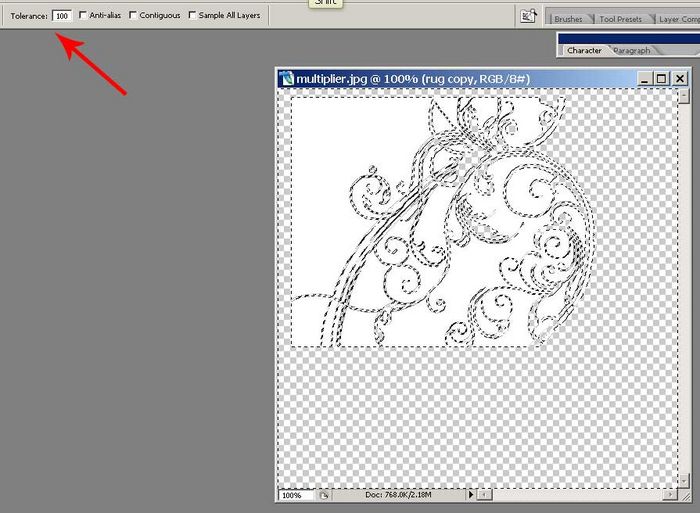
Using the Wand Tool(Tolerence=100), select the black area and press Delete.
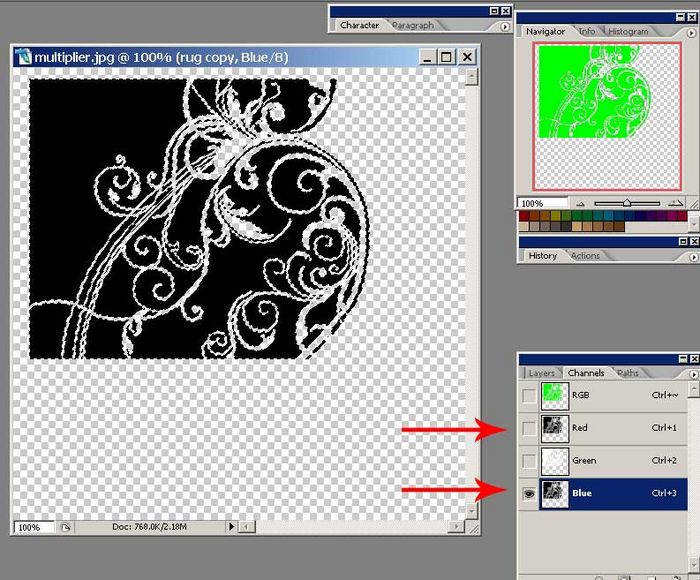
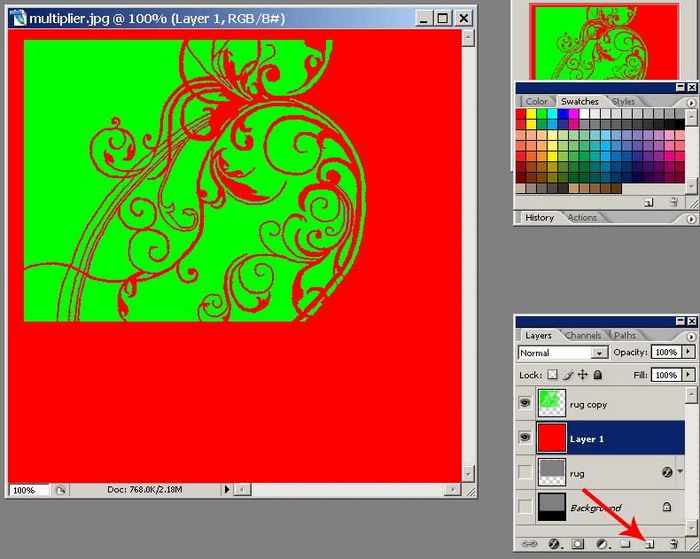
Invert the selection(CTRL+SHIFT+I), and click on the Channels tab. Select the Red layer and press CTLR+I(Invert), and the selection will turn black. Select the Blue layer and do the same. Select the RGB layer and click on the Layers tab to go back. The white part of you design should now be green. Press CTRL+D to deselect.
10. Select the rug layer and click the Create New Layer button. Bucket-fill the new layer with pure red.
(optional)
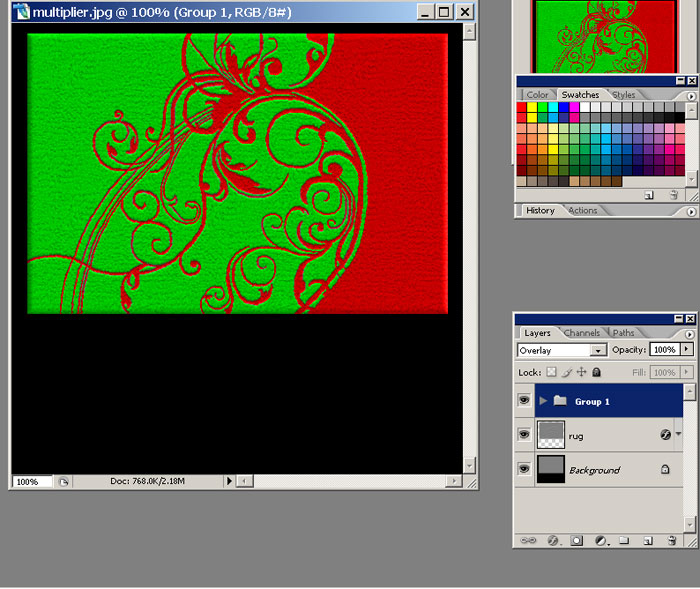
11. To preview the rug, select the green layer, then hold SHIFT and select the red layer. Click and drag the layers down to the Create New Group button(the little folder).
Change the blending mode to Overlay. Then make the rug and background layers visible again.
[edit] Exporting the Images
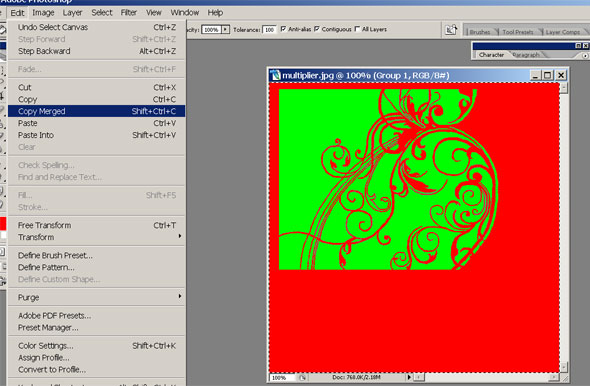
12. Change the mask folders blending mode back to Normal. Press CTRL+A(select all) and in the Edit menu, select Copy Merged.
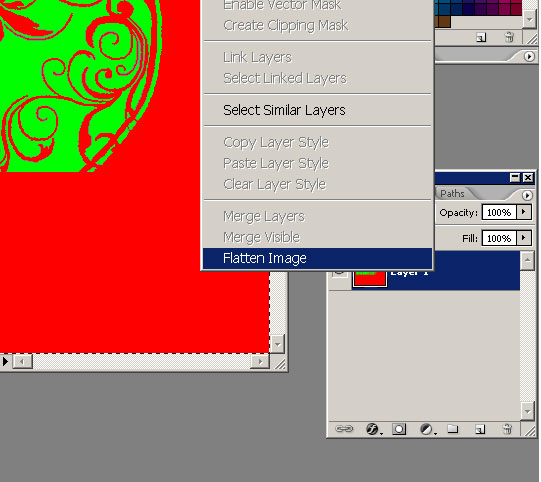
Then click File>New and in the dialogue click OK. Press CTRL+V(paste) to paste your mask. Right-click on the layer and select Flatten Image. Save as a DDS(DXT1 no alpha).
13. Go back to you working image and hide the mask folder. Repeat step 12 with your multiplier.
[edit] Putting it in the package
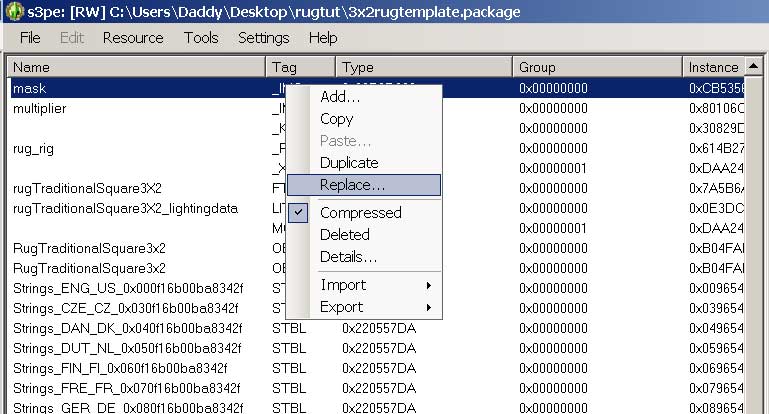
14. Open s3pe and open the RugTemplate package. Right-click on the mask _IMG, select replace, and navigate to your mask image. Do the same for the multiplier _IMG.
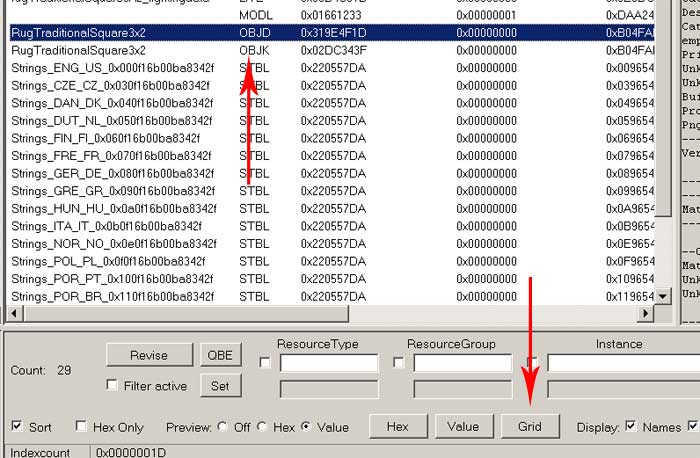
15. Select the OBJD and click the Grid button.
Select Materials and click the button on the right to open it.
Then expand the MaterialBlock, select MaterialBlocks and click the button to the right.
In the [0]MaterialBlock, select TypeCodes and click the button on the right.
16. You should now see the RGBA for the A pattern. *One thing to note, the Blue field is really the Red, and vice versa. Green is green.*
Change the hex value to the hex value of the color you want. When you are done, click OK.
Select [1]MaterialBlock and repeat this step for your B pattern. Then click OK, OK, Commit. Save the package and test in-game.
[edit] Adding More Designs
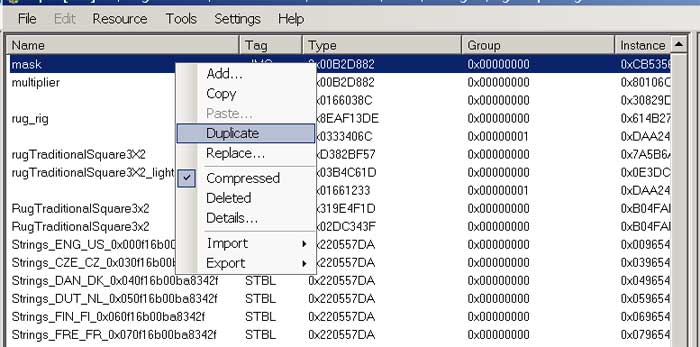
17. To add another rug design as a preset, open your package, right click on the mask and select Duplicate.
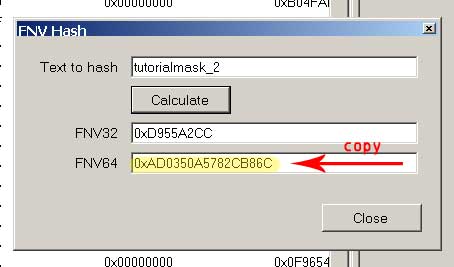
Press CTRL+F to open the FNVHash tool and enter a name in the Text field. Push Calculate, copy the value in the FNV64 field, and press Close.
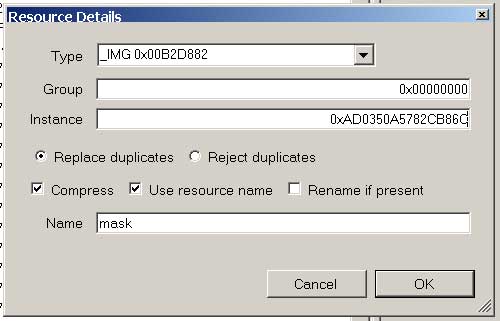
Double-click on the duplicate you made and replace the Instance value with the value you copied from the Hash tool, then press OK. Repeat this process for the multiplier as well.
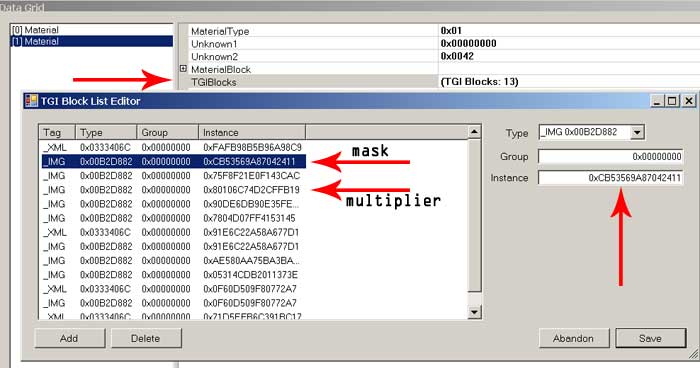
18. Select the OBJD and click the Grid button. Select Materials and click the button on the right to open it. With [0]Material selected, click the Copy button. Change the Unknown3 to the next number up (in this case 0x00000002, next would be 0x00000003 and so on). Click OK, and Commit.
19. Go back into the OBJD/Materials and select the new material. Select TGIBlocks and click the button on the right. Select the first IMG, and change it's instance number to that of your new mask. Then select the third IMG and change it's instance number to that of your new multiplier.
Click OK, and then go back to step 15 to change the colors. Save your package and test in-game.
[edit] Questions?
Please direct any comments or questions here. Have fun!
| Tutorials by Category | |
|---|---|
|
CAS | Patterns | Objects | Building | Worlds | Modding | Modding Reference |
