Difference between revisions of "Tutorials:Taking Totally Bitchin Pics"
(→Advanced Sets) |
(→Advanced Sets) |
||
| Line 168: | Line 168: | ||
Instructions on creating more complicated sets, which are generally quite a bit more time consuming. Of course, these instructions just show the basics you will need to make these sets... you can always expand on the techniques and use different content for a variation on the theme. Again, it's recommended you read through all of these, as there are great tips in each one that you may be able to use for all kinds of other things, too. | Instructions on creating more complicated sets, which are generally quite a bit more time consuming. Of course, these instructions just show the basics you will need to make these sets... you can always expand on the techniques and use different content for a variation on the theme. Again, it's recommended you read through all of these, as there are great tips in each one that you may be able to use for all kinds of other things, too. | ||
| − | ===[[Tutorials:Taking Totally Bitchin Pics/Garden Set|Garden Set]]=== | + | ===[[Tutorials:Taking Totally Bitchin Pics/Garden Set|Garden Set]]=== |
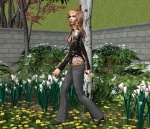
| − | + | [[Image:Bitchinpics-16.jpg|right|150x200px]] | |
| − | How to set up a realistic, beautiful outdoor scene, for a very natural look. | + | How to set up a realistic, beautiful outdoor scene, for a very natural look.<br style="clear:both" /> |
===[[Tutorials:Taking Totally Bitchin Pics/Beach Set|Beach Set]]=== | ===[[Tutorials:Taking Totally Bitchin Pics/Beach Set|Beach Set]]=== | ||
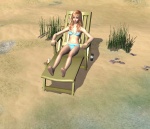
| − | + | [[Image:Bitchinpics-25.jpg|right|150x200px]] | |
| − | For your hot sims on hot days, here's how to set up a realistic beach set. | + | For your hot sims on hot days, here's how to set up a realistic beach set.<br style="clear:both" /> |
===Home Set=== | ===Home Set=== | ||
| Line 181: | Line 181: | ||
===[[Tutorials:Taking Totally Bitchin Pics/Stage Set|Stage Set]]=== | ===[[Tutorials:Taking Totally Bitchin Pics/Stage Set|Stage Set]]=== | ||
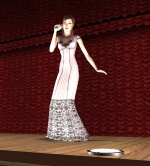
| − | + | [[Image:Bitchinpics-55.jpg|right|150x200px]] | |
| − | To set up a stage for a play or musical performance, here's some simple instructions that will get you rockin' in time for the show. | + | To set up a stage for a play or musical performance, here's some simple instructions that will get you rockin' in time for the show.<br style="clear:both" /> |
===[[Tutorials:Taking Totally Bitchin Pics/Runway or Catwalk Set|Runway or Catwalk Set]]=== | ===[[Tutorials:Taking Totally Bitchin Pics/Runway or Catwalk Set|Runway or Catwalk Set]]=== | ||
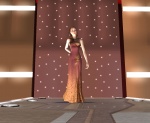
| + | [[Image:Bitchinpics-42.jpg|right|150x200px]] | ||
| + | Yes, yes, we all make VERY pretty pixel dolls, don't we? Well, if you've got some skinny little model in a ridiculous outfit and funky makeup that just HAS to strut down a runway, here's how to make a pretty one.<br style="clear:both" /> | ||
==Posing Sims== | ==Posing Sims== | ||
Revision as of 15:05, 16 December 2006
Contents
|
Taking Totally Bitchin' Pics
This long and verbose tutorial will give you tons of info on making your pics for your creations and contests much better. This tutorial is mostly focused on sims and taking pics of them and their content, but the tips here will be useful for many applications.
Introduction
Okay, so, your pics suck. No, they do, really, just admit it. It's okay. Admitting it is the first step. Breathe deep and just let it out. There, there, it's all right. We'll get you fixed up.
Yes, this tutorial is long, and has many sections, but if you go through everything in order, read everything, and wrap your mind around it, you are guaranteed to no longer suck.
The game's engine is capable of taking some awesome pics, but you really have to know what you're doing in order to make use of it.
You Will Need
- The Sims 2, duh.
- A decent enough graphics card that you can turn up Sim/Object Detail, Lighting, and Texture Detail to High. You do not need smooth edges, reflections, or any other fancy doodadery. I don't even have a graphics card, let alone a good one, just some patience with slow framerates.
- A graphics editing program. The better the program the more you will likely be able to do with filters, etc. to improve your pics. I recommend Photoshop - though the current versions are several hundred dollars, you can purchase a used copy of Photoshop 7 for around $40 on eBay and get most of the same functions. You can also use Paint Shop Pro, Corel Photo Paint, Paint.NET, and GIMP, the last two of which are free. You can likely use most any other program that is capable of a few filters like Brightness/Contrast and Levels, some blurs, and multiple layers.
This tutorial will be written showing techniques from Photoshop, specifically Photoshop CS2. If you have earlier versions of Photoshop, or if you are using a different program, you may not be able to do everything here, or you may not be able to do things exactly as they are stated here with the same tools - most programs will offer alternate methods to do just about anything, but it's up to you to know your graphics editing program and know it well. This is NOT a tutorial for people who have just stopped playing in Microsoft Paint, so if you're unclear on your program, go Google "beginner (program name) tutorial".
Get Hacks
There are two important modifications you need to make to your game before you continue, if you want to take truly awesome pictures.
- GunMod's Camera Hack will give you MUCH better control of the camera in Cameraman mode, and allow angles and shots you could never achieve with the limits on the default camera.
- Radiance Lighting 2.2 will change the way the game's lighting works, to make for much more realistic, dramatic lighting effects. You can probably use Radiance Lighting even if you have a crappy graphics card. You will likely have to fundamentally change the way you use lighting once you install it, though, and you'll often find yourself using more lights to get things well lit. For more on using lights under Radiance Lighting, see the information in the tutorial on lighting your scene.
Those above two are pretty much essential, but if you're taking pictures of sims and you want some really great poses, you're going to need some hacks or hacked objects that allow you to put your sim in a variety of poses on demand. For that, you'll want to see the list at Content List: Hacks and Hacked Objects: Pictures, Movies, Stories, and Poses. Specific items listed there and ways to utilize them will be gone over in the rest of the tutorial.
Windowed Mode
In order to take your pictures using the methods described here, you will need your game running in a window, so you can easily switch to other applications without causing major instability and lag. Instructions on setting up Windowed Mode may be found here.
Make Your Sim
Sims look best on a lot, so we're going to create a sim and put it on a blank lot to take pics. This will make an extra character file just to take pics, so if you have a big, overcrowded Legacy neighborhood, you might want to create a blank neighborhood for pics and testing to keep this out of your main 'hood.
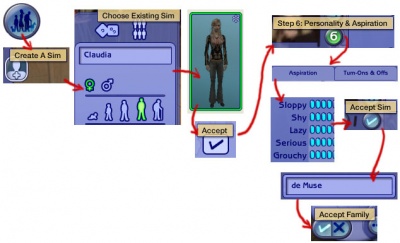
Otherwise, go into Create a Family/Create a Sim and to in to create a sim. Enter a first name, and make sure you have it set to the right age and gender. Then click on the Choose Existing Sim button. Find your sim in the sim bin and click Accept. Jump to 6, where you set your sim's personality and aspiration. Choose an aspiration for your sim, and set their personality points. To avoid slouchy, gross sims, make sure they have at least 3 points in Sloppy and Lazy. Setting it to Aquarius gives you a basic personality. If you have Nightlife give your sim some Turn-Ons and a Turn-Off. Then choose Accept Sim. At the family screen, type a family name, and then click Accept Family.
Create a Set
Now you'll be back in your neighborhood. It's time to create an empty lot that you can use as a picture-taking set for your sim.
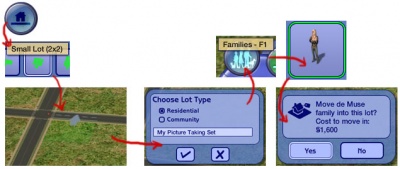
Click on the Lots and Housing button, then choose an empty lot. 2x2 is a good size. Place the lot in a blank spot in your neighborhood, and give it a name. It should be a Residential lot. Click on the Families button and find the sim you just made in the sim bin. Click on the empty lot you just created and move them into it.
Game Options
Graphics Settings
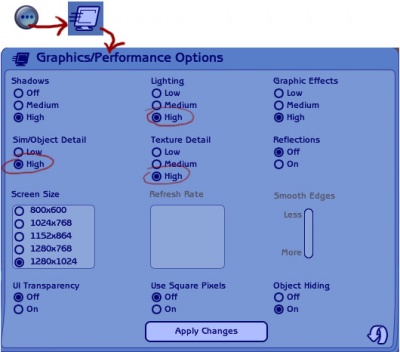
When you have gotten the lot fully loaded, you will want to first make sure your graphics options are turned up. Click on Options - Graphics/Performance Options.You will need Lighting, Sim/Object Detail, and Texture Detail at least turned up to High. Shadows can also help your pictures look more realistic, depending on how nice a graphics card you have. When you have turned your settings up, click Apply Changes.
It may take several minutes for the game to begin responding again. You will get a dialogue asking if you want to save your changes with a countdown of 15 seconds. Click yes within those 15 seconds to keep your new settings - if you miss seeing that window, your options will revert to their previous levels, and it may seem like nothing happened.
Free Will
Now we need to make sure our sim is not going to go running off to read the paper while we're trying to take pictures. Click on Options - Game Options and turn OFF Free Will.
Camera Controls
Take some time to just play around with the camera, especially if you have just installed the camera hack. It can take a while to get used to the camera controls, and even once you are experienced in their use, it may be challenging to get the shot you want with the constraints on the controls.
If you haven't taken many sim pictures before, here is a list of camera controls:
- TAB
Puts the game into Cameraman mode, allowing better and more control of the camera. Make sure you are in live mode before going into Cameraman mode or you will see grid lines on the ground and floating where floor tiles may be placed.
- W and S
W moves the camera forward. S moves it backward.
- A and D
A moves the camera left. D moves it right.
- Q and E
Q lowers the camera. E raises it.
- + and -
Zooms in and out. The further you are zoomed in, the smaller the increment you will move when using the WASD keys if you have the camera hack as advised above.
Cheats
Remember, our focus here is not on playing the game by all the rules, but taking the absolute best pictures we can, so cheat like mad! Here are some cheats that you should definitely be familiar with, and how they may be of use to you for picture taking:
- moveObjects on - This will allow you to place more than one object on a tile, and pick up and move items that you cannot normally manipulate. Most importantly, this will allow you to pick up and move your sim by hand just as you would any object, rather than having to wait for them to walk somewhere, assuming there is even a complete route to where you want them. Please note that if you have this cheat set to on, windows and doors will not snap onto walls, especially diagonals - you will need to set it back to off for easy placement of doors and windows.
- boolProp snapObjectsToGrid [true/false] - With this cheat set to false, you'll be able to place objects exactly as you want them, without them snapping to the gridlines. This will allow much better placement of sims as well as objects, and can make for a much more natural, haphazard look to the placement of objects in your pictures. Please note that if you have this cheat set to false, your windows and doors will no longer place properly - you will need to set it back to true for them to snap into place.
- boolProp allow45DegreeAngleOfRotation [true/false] - Instead of just having the four cardinal directions to rotate sims and objects, with this cheat set to true, you'll be able to rotate objects in 45 degree increments, allowing you to place objects and sims diagonally. This is helpful for exact positioning of a sim facing the direction you want them, and again, will make for more natural looks to scenes. You will need to use the < and > (, and .) keys on your keyboard to rotate the objects - clicking and dragging will not work. You will need at least one expansion to use this cheat normally. However, because the coding for this cheat was actually included in the base game, you can use this hacked bamboo plant by wintermuteai1 at MTS2 to accomplish the same thing in the base game.
- plumbbobToggle [on/off] - Set to off to turn off the plumbbob (floating diamond) that denotes your active sim. You will need Open for Business or later expansions to use this cheat. If you do not have Open for Business or later expansions, you can use the No Balloons Patch by Inge Jones at SimLogical to remove the plumbbob, or make sure you crop it out of your photos.
- showHeadlines [on/off] - Set to off to turn off thought bubbles, speech bubbles, and relationship gain/loss (++/-- graphics) over sims' heads. Making sure these graphics and the plumbbob are off (or cropped out of your pics) will make for a much more realistic look. You will need the Nightlife expansion or later for this cheat to work. If you do not have Nightlife or later expansions, you can use the No Balloons Patch by Inge Jones at SimLogical to remove these graphics.
- slowMotion [0-8] - Allows you to slow down the game's speed. Acceptable values are 0-8, 0 being normal game speed, and 8 being the slowest. Generally slowMotion 4 is about the right speed to use for picture taking, as it allows you to pause on exactly the right facial expression and pose for the perfect picture.
- maxMotives - Maxes all the needs and motives (hunger, bladder, etc.) of every sim on the lot. Very useful for keeping sims from wetting themselves while you're trying to get them to pose. You will need Nightlife or later expansions to use this cheat.
- motiveDecay [on/off] - Set to off to stop the slow reduction of sim needs and motives over time. Helpful in combination with maxMotives for long picture-taking sessions. You will need Nightlife or later expansions to use this cheat.
- aspirationLevel [0-5] - Set the sim's aspiration to the selected level. 0 is aspiration failure, 5 is platinum. Useful to keep your sims from going nuts and having a visit from the psychiatrist while you're trying to take pics. You will need Nightlife or later expansions to use this cheat.
- lockAspiration [on/off] - Set to on to keep a sim's aspiration from slowly lowering over time. Use in combination with aspirationLevel 5 to keep your sims happy and sane for long picture-taking sessions. You will need Nightlife or later expansions to use this cheat.
- setHour [0-23] - Allows you to set the hour of the day, so you can take nighttime shots with ease, or switch back to daytime if it gets dark in the middle of your shoot. You will need Open for Business or later expansions to use this cheat.
There is a full listing of all of the cheats with their expansion pack requirements and descriptions of their use available in the Game Help section at MTS2. There may be more cheats that you will find useful there as well.
If you would like to shorten some of the longer cheats for easier use (so you can just type "moo" instead of "moveObjects on" for instance), or put on certain cheats automatically, you can do so by setting yourself up a userstartup.cheat file. There is a tutorial on how to do that on MTS2 in the Game Help section.
Basic Set
The most basic type of set is just two walls with flooring stretched between them. This will give you nice, brightly-lit pictures, and is perfect for getting a picture of a sim taken against a solid-colour background, often a requirement for contests. If you need some simple, basic walls in a variety of colours, try this set by FionaAzrael at MTS2.
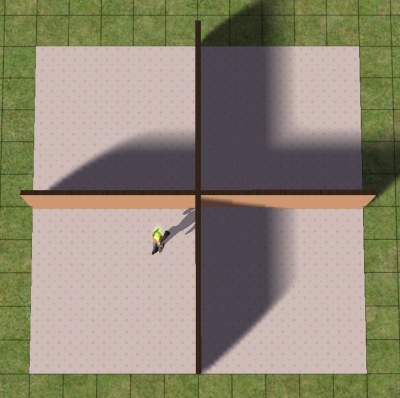
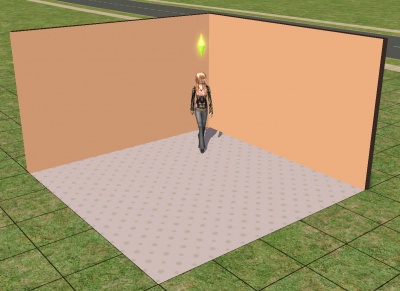
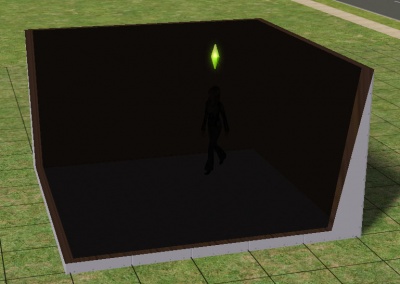
Try placing walls and floors as shown, in a cross shape. Take a look at each corner in the game and notice the lighting. See how only one of those four corners is well-lit on both walls and the floor, the bottom left corner? You would want to place your sim in this corner for picture taking, as it will give you nice, clear, brightly-lit pictures. Placing your sim in any of the other corners, with shadows in them, would give you darker pics that won't look as nice.
You don't need to build this whole cross shape each time, just place some walls horizontally and vertically to see which direction the light is coming from, then build the one lit corner - two walls in an L shape, with flooring stretched between them.
Full daylight will give about the brightest, clearest light you can get in the game, but it can wash out some details, especially if what you are photographing is mostly very light colours.
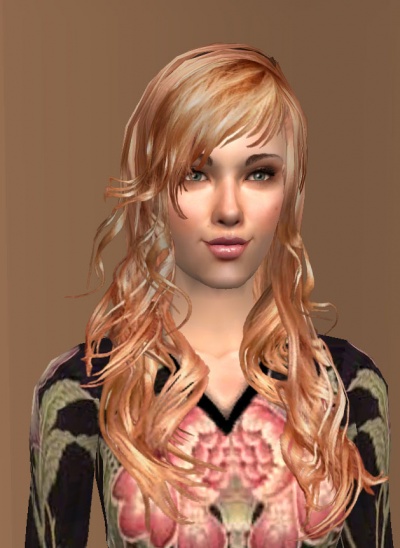
Notice how certain areas in the brightly-lit pic that are highlighted lose detail - the white parts on her cheeks, nose, forehead, and chest, and a little bit on the design on the front of her shirt and in the highlights of her hair, there is a loss of detail due to brightness. You don't get that same loss of detail in the darker pic, and there is more depth to the colours, but there are also no bright highlights at all, and the low-contrast makes things look muddy.
Indoor Set
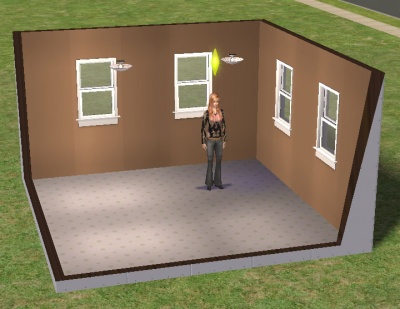
Exterior lighting will give you bright lighting, but if you would like more depth to your pictures without bright, harsh daylight, you can add a few walls to the simple set, and create an interior set. It may be tempting to use an existing house for pictures, but generally building a small set just for pics is better, as you will be able to take pictures much quicker on a smaller lot with only your needed walls and objects.
Notice how even though it is an interior pic, because much of the lighting is from the windows, the room is better lit on the near corner, and darker in the far corner. You would want to make sure you have your sim facing toward the direction of the light, so they are better lit for pictures.
Notice how the dark parts of her shirt still have a little shading to them, but the light parts of her cheeks, nose, forehead, and upper chest don't lose detail. There is much more depth to the lighting in a well-lit interior shot. You can still overdo it with lighting if you use certain lights directly above a sim, too many lights, lights which are too bright, or your sim has very light skin, eyes, or hair. Pay attention to the highlighted areas and make sure they still have depth, and watch the darker areas to make sure they are not too light or too dark as well.
Advanced Sets
Instructions on creating more complicated sets, which are generally quite a bit more time consuming. Of course, these instructions just show the basics you will need to make these sets... you can always expand on the techniques and use different content for a variation on the theme. Again, it's recommended you read through all of these, as there are great tips in each one that you may be able to use for all kinds of other things, too.
Garden Set
How to set up a realistic, beautiful outdoor scene, for a very natural look.
Beach Set
For your hot sims on hot days, here's how to set up a realistic beach set.
Home Set
Loft or Industrial Set
Stage Set
To set up a stage for a play or musical performance, here's some simple instructions that will get you rockin' in time for the show.
Runway or Catwalk Set
Yes, yes, we all make VERY pretty pixel dolls, don't we? Well, if you've got some skinny little model in a ridiculous outfit and funky makeup that just HAS to strut down a runway, here's how to make a pretty one.
Posing Sims
Stage Performance or Singing
For your rock star, lounge singer, or hot little diva, here's how to get some great poses that really make it look like your sim is performing on stage.
