Difference between revisions of "Game Help:TS3 Back Ups"
m (→Checking Game File Size (You need to do this in all cases)) |
m (→Compression Technique Zip) |
||
| Line 113: | Line 113: | ||
| − | [[Image: | + | [[Image:BackUpts306.png]] |
| Line 119: | Line 119: | ||
| − | [[Image: | + | [[Image:BackUpts307.png]] |
| Line 125: | Line 125: | ||
| − | [[Image: | + | [[Image:BackUpts308.png]] |
| Line 131: | Line 131: | ||
| − | [[Image: | + | [[Image:BackUpts309.png]] |
You can keep this file on your hard drive for future use. Don’t forget to delete the file when you no longer need the backup, or when it becomes outdated. | You can keep this file on your hard drive for future use. Don’t forget to delete the file when you no longer need the backup, or when it becomes outdated. | ||
| − | <big>This should be repeated for your Mods/Packages folder found at "''Program Files\Electronic Arts\The Sims 3\''"</big> | + | <big>This should be repeated for your Mods/Packages folder found at "''Program Files\Electronic Arts\The Sims 3\''"or the Expansion Pack or Stuff Pack you installed them to.</big> |
====Compression Technique Rar==== | ====Compression Technique Rar==== | ||
Revision as of 07:58, 10 April 2010
| Sims 3 Game Help Categories: | |
|---|---|
|
Custom Content | Installation | Gameplay Guides | Technical & Graphics Issues | Miscellaneous Issues | |
| MTS Help Q&A Forums | |
Backing Up The Sims 3
Why should I back up my files?
Reasons:
Before you make any changes or repairs to your computer, or install a new patch or expansion pack you should back up your game files so that your content will not be lost. This is especially important for saved files and store content that you do not want to redownload.
It is also a good idea to back up these files periodically in case something goes wrong, or in case you want to test new hacks or transfer the files to a different computer. Remember, this is EA we're talking about...things tend to break.
Please note that backing up can take up a lot of disk space. If your harddisk does not have sufficient space, consider backing up your files onto a secondary drive, if you have one, or burning it to a CD/DVD.
What should I back up?
User Profile
- Go to you user profile path in "Documents\Electronic Arts\", right-click "The Sims 3" folder and select "Copy".
- Go to your desktop and Right Click and choose "Paste" - This will move your folder to your desktop.
The User Profile contains all of the following information and settings:
- Downloads - the Sims3Pack files you downloaded from the store, these files would need to be reinstalled via Launcher
- Exports - the Lots you have "shared"
- Library - the Lot Bin in the Edit Town screen
- SavedSims - your Sims
- Saves - your saved towns and games
- Recorded Videos & Screenshots - if you have any of these for storytelling
- UserPresets.package - if you have saved any color or pattern changes
Mods Folder
The mods folder is where your packaged content is placed. It's always a good to backup and remove these files before installing a new patch or EP. However, this folder and its contents should obviously be left where it is if you're trying to solve a custom contents problem.
- To remove your folder go to "Program Files\Electronic Arts\The Sims 3\" - Take note that this folder is in the "Program Files" folder, NOT "My Documents".
- Right click on the folder labeled "Mods" and select "Cut"
- Go to your desktop and Right Click and choose "Paste" - This will move your folder to your desktop. Doing so may take a few seconds.
If you have your packages installed into an EP folder (i.e. "Program Files\Electronic Arts\The Sims 3 World Adventures\") then this procedure should be done there respectively.
How do I create the backup?
Please note that these steps are based on the guide for backing up The Sims 2. The images shown will show TS2 files, however, the concepts are the same.
The first thing you need to do is to decide what you are going to do:
- Explorer Copy: You can copy your files to another part of your hard drive, or to a spare hard drive if you have one. You could also compress the information (Zip or Rar) to save space.
- CD/ DVD Copy: You can copy your files to a CD or DVD for storage, or for moving to another computer.
If you are backing up because you wish to have a copy off your hard drive for some reason (for example, computer maintenance or moving to a different computer), you should back up to CD or DVD. If you are backing up so that you can test new hacks or just because you wish to save your families, you could backup either to CD, DVD or hard drive. You need to make sure you have enough space on your computer if you wish to save to hard disc.
Checking Hard Drive Space (Skip this if you plan to copy to CD/ DVD)
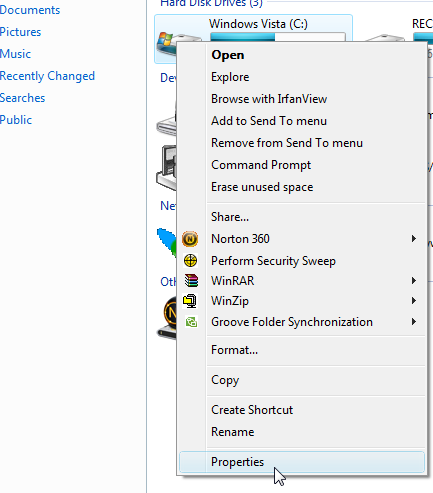
Click the Start button and My computer, and right click on the drive with your documents on it- this is usually drive C. Select Properties.
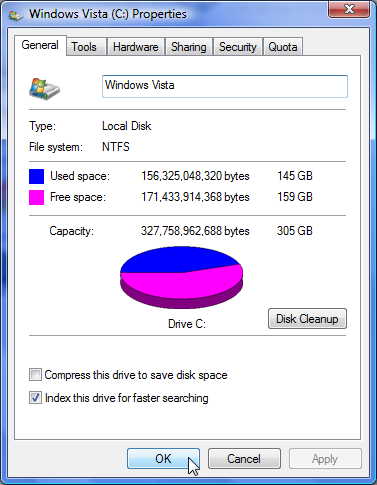
You should now see this:
Used Space and Free Space are clearly marked, usually in GB. a GB is just over 1000 Mb.
Checking Game File Size (You need to do this in all cases)
Next, you need to check the size of your Sims 3 files in your Documents folder, to see if it will fit in your spare hard drive space or CD/ DVD:
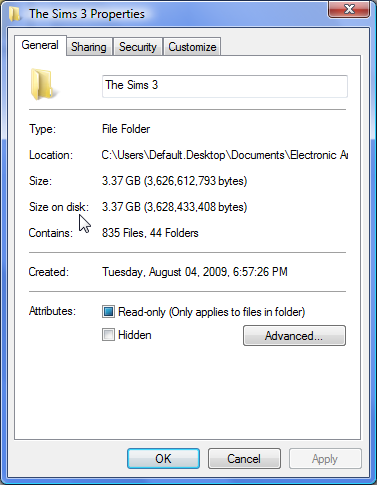
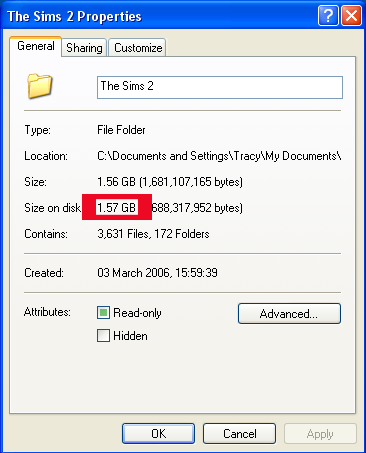
Click on ‘My Documents’, then ‘Electronic Arts’. Right click on the Sim 3 folder, and choose Properties. Wait for the computer to count the file size, and check the figure:
The figure next to "Size on disk" is the one you’re interested in- if you have a lot of custom content this can be vast! If you have more free space on your hard disc than your Sims3 folder takes up, you can choose any option. If you have around 75% or more you could save to hard drive by Zip or Rar; if you have around 50% or more, you could save to hard drive by Rar. If you have less than 50% you should save to CD or DVD, or free up some hard disc space.
This should be repeated for your Mods/Packages folder found in "Program Files\Electronic Arts\The Sims 3\" or under the Expansion Pack or Stuff Pack you installed them to.
Explorer Copy
Copying To The Hard Drive
To backup your files to another part of your hard drive, you need to copy them to the Desktop.
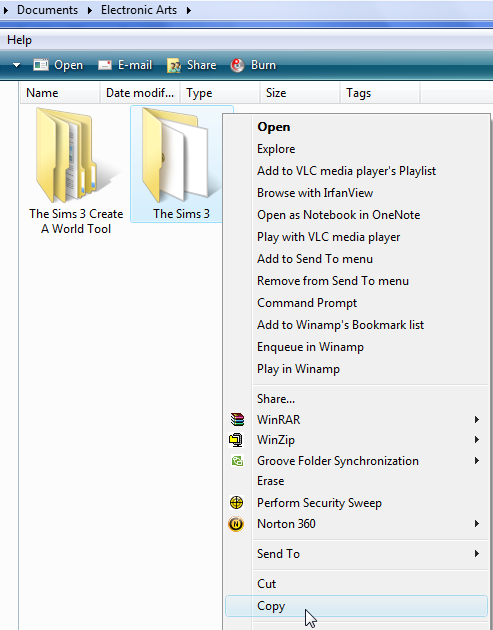
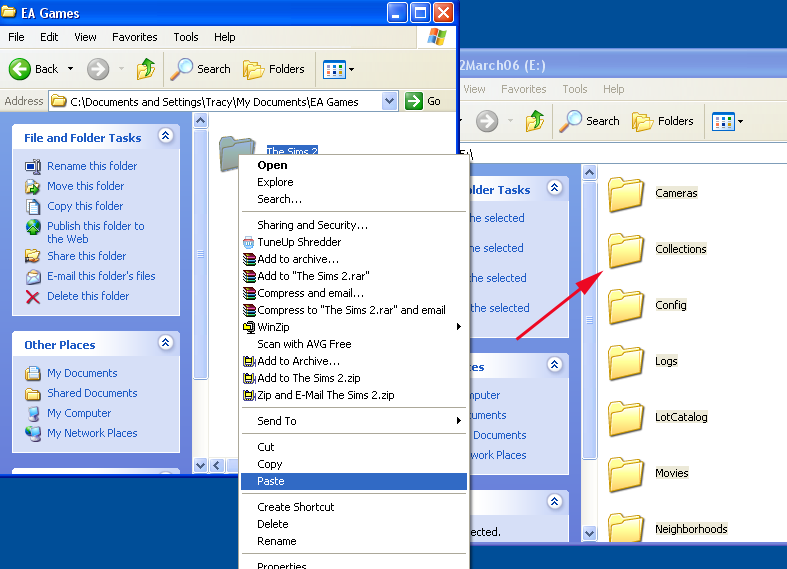
Close the game and make sure S3PE, S3OC, CTU, Create-a-World or any other program related to The Sims 3 are NOT running. Open My Documents, and double click on the "Electronic Arts" folder. Now right click on the Sims 3 folder and choose copy:
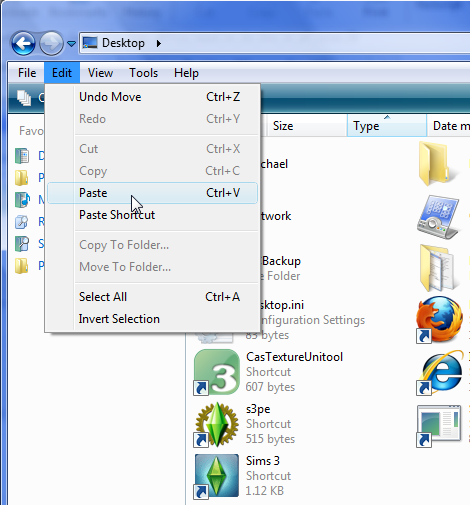
Get back to the desktop and right-click, Paste.
That’s it, your backup is done! Your Sims 3 folder is safely copied to the Desktop.
This should be repeated for your Mods/Packages folder found in "Program Files\Electronic Arts\The Sims 3\" or the Expansion Pack or Stuff Pack you installed them to.
Compression Technique Zip
WinZip Archive
I’m showing you how to do this on WinZip, of which you can obtain a trial version. If you have a different Zip archiving package the principle will be the same and the steps very similar.
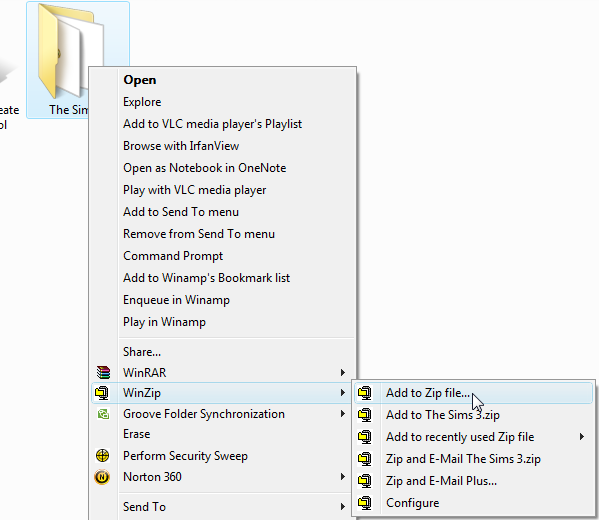
Open My Documents, and double click on the "Electronic Arts" folder. Now right click on the Sims 3 folder and choose Win Zip> Add to Zip file:
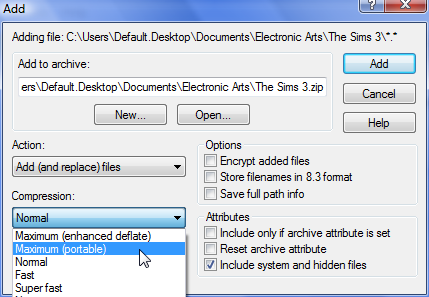
You should then see this screen- choose ‘Maximum (portable)’ where I’ve shown with the arrow.
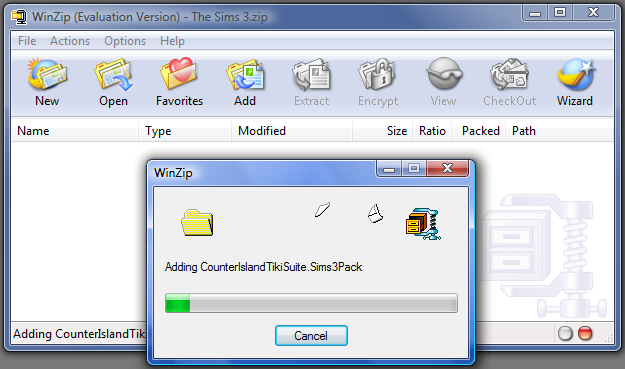
Click ‘Add’, and the archive will be created. This may take a while:
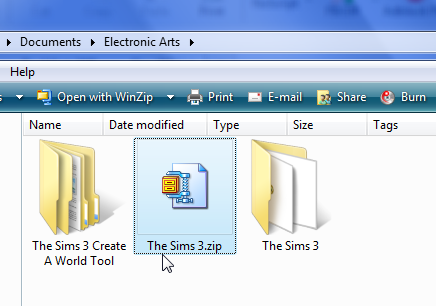
Once the Zip Archive is created, you should see this:
You can keep this file on your hard drive for future use. Don’t forget to delete the file when you no longer need the backup, or when it becomes outdated.
This should be repeated for your Mods/Packages folder found at "Program Files\Electronic Arts\The Sims 3\"or the Expansion Pack or Stuff Pack you installed them to.
Compression Technique Rar
WinRar Archive
I’m showing you how to do this on WinRar, of which you can obtain a trial version. If you have a different Rar archiving package the principle will be the same and the steps very similar.
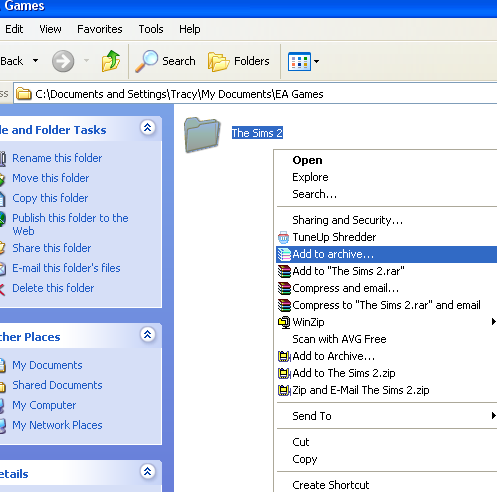
Open My Documents, and double click on the "Electronic Arts" folder. Now right click on the Sims 3 folder and choose Add to Archive:
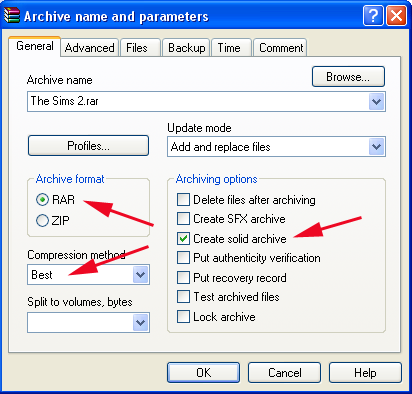
You should then see this screen- choose ‘Best’ and ‘Rar’ where I’ve shown with the arrow, and also ‘Create Solid Archive’. Note: as you can see, WinRar can compress to Zip or Rar format, but it cannot handle Zips over 2000Mb in size.
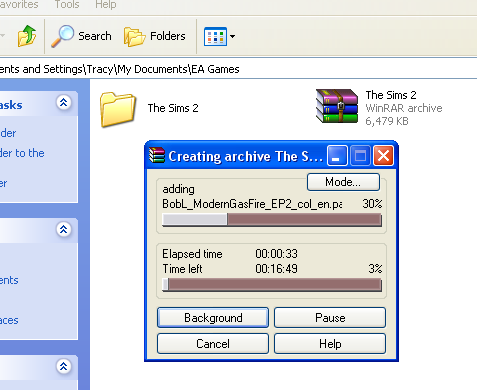
Click ‘OK’, and the archive will be created. This may take a while:
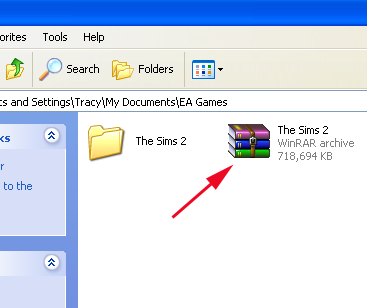
Once the Rar Archive is created, you should see this:
You can keep this file on your hard drive for future use. Don’t forget to delete the file when you no longer need the backup, or when it becomes outdated.
This should be repeated for your Mods/Packages folder found at "Program Files\Electronic Arts\The Sims 3\"
Creating a CD/ DVD Backup
Burning Backed-up files to CD or DVD
If you do not have much spare hard drive space, or you wish to make a copy to transfer to another computer or for safekeeping, you can burn (write) your backup files to a CD or DVD. For this you need a CD or DVD writer (if you don’t have one you cannot make a backup by this method!) and some blank writable CD or DVD discs. You could also use re-writable discs if you have a CD/ DVD RW drive and discs. The software I’m going to use Nero Express- most CD/ DVD drives are shipped with a copy of this. If you have different software, the principle is the same and the procedure very similar.
First, you need to check the size of the files:
- Click on ‘My Documents’
- then ‘Electronic Arts’
- Right click on the Sim 3 folder
- Choose Properties.
- Wait for the computer to count the file size
- Check the figure:
The figure highlighted in red is the size of your game files.
- If it is 700Mb or less, you can write the files to a CD or DVD.
- If it is under 4.37 Gb, you can write the files to a DVD.
- If it is more than 700Mb and you don’t have a DVD writer, you can burn to more than one CD.
- If it is more than 4.37 Gb you can burn to more than one DVD.
(Seriously, though- if you have more than 4.37 Gb, maybe it’s time for a clear out!)
Next, burn the files:
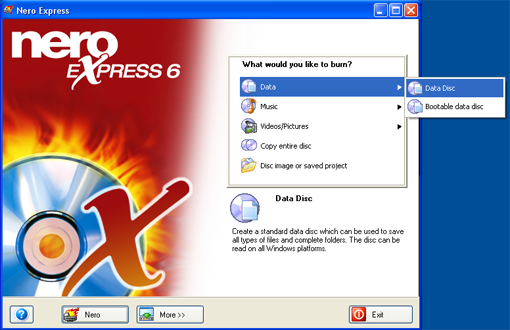
- Insert a blank disc into your drive, appropriate to the drive type and your requirements. Click on the start menu to open Nero Express. It should be under ‘Ahead’, or ‘Nero’. On mine it is under Nero> Nero6 Ultra Edition.
- You should see a screen similar to this- if you have more than one CD or DVD writer on your computer, you’ll see a drop down menu to select which drive you use (make sure you don’t select ‘Image Recorder’).
- Choose Data> Data Disc
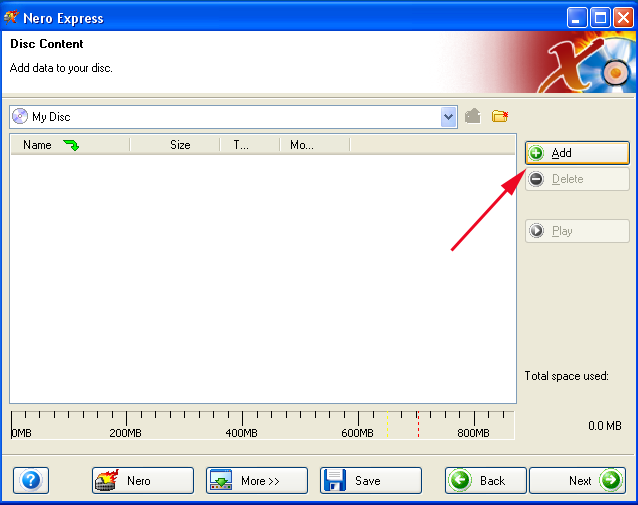
Click on ‘Add’…
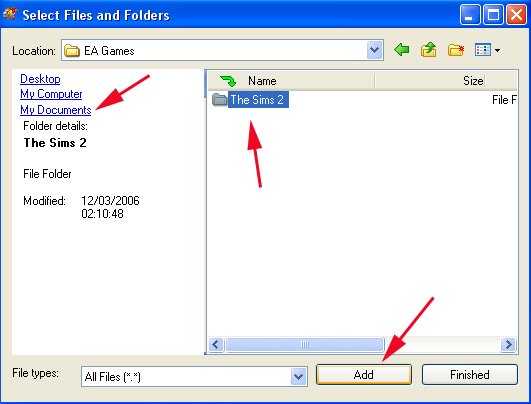
Then choose:
- ‘My Documents’
- Click the 'Electronic Arts' folder
- Select ‘The Sims 3’ folder
- Click Add
Now, if when you checked your file size, your Sims 3 folder was larger than the size of disc you are writing to (700Mb for a CD and 4.37Gb for a DVD), then you’ll probably see a screen like this:
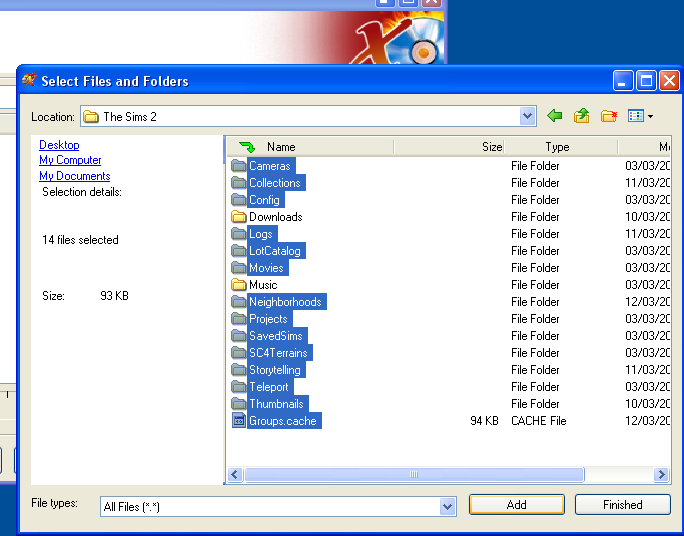
The significant part is the coloured line at the bottom- it has changed from blue into red, indicating that there is more data than can be stored on that disc. You now need to click the ‘back’ button, click ‘No’ to do you want to save, and begin again. This time, double click on the Sims 3 folder to get into the subfolders:
Select some of the folders as I have. Which you choose is really an estimation; I chose them all except for the ‘downloads’ and ‘Music’ folders, because I know I have a lot of files in those folders. This time, when I clicked ‘add’ I saw a screen like this:
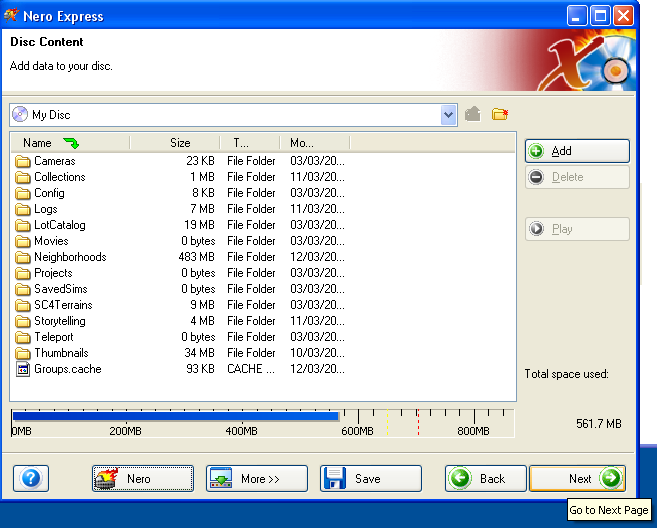
As you can see, the bar on the bottom is blue and it reads at just under 600Mb. I could now add another folder or file by clicking the ‘add’ button again if I wished. The important thing to remember is to take note of which files you have on disc, and which you have yet to copy. Then, when you make the next disc you’ll know which files to add. If you have a lot of custom content in your downloads folder it’s possible that you may have to split the downloads folder into two to get it onto CD. As long as you remember to back up ALL of the files and don’t go over the disc limit, you’ll be okay.
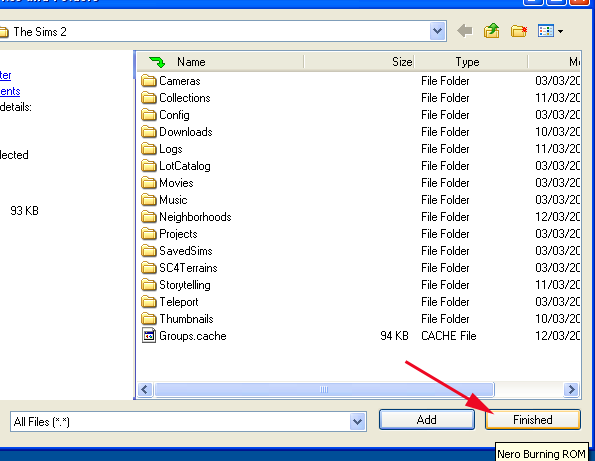
Once you are happy with your selection, chose ‘finished’…
And click ‘Next’.
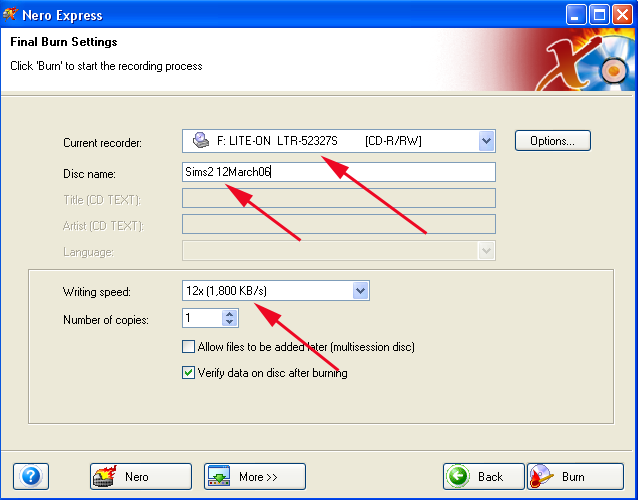
Once again you need to confirm which disc drive you are using- make sure you do not select ‘Image Recorder’. Give the disc a name and select the speed you require. It’s sensible to make this lower then the maximum writing speed, as making data discs with a large number of small files can fail easily at high speeds.
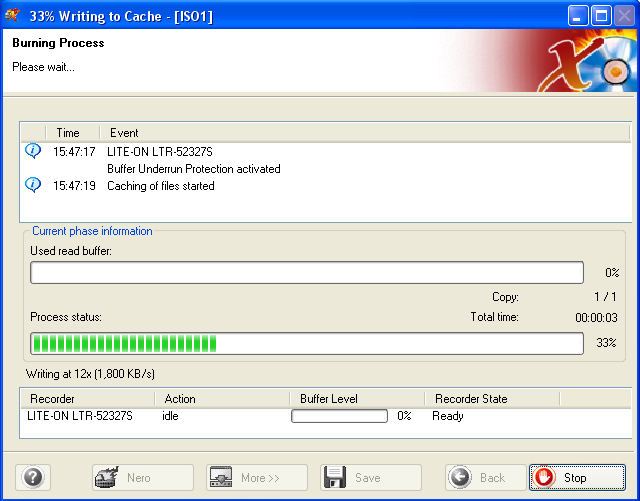
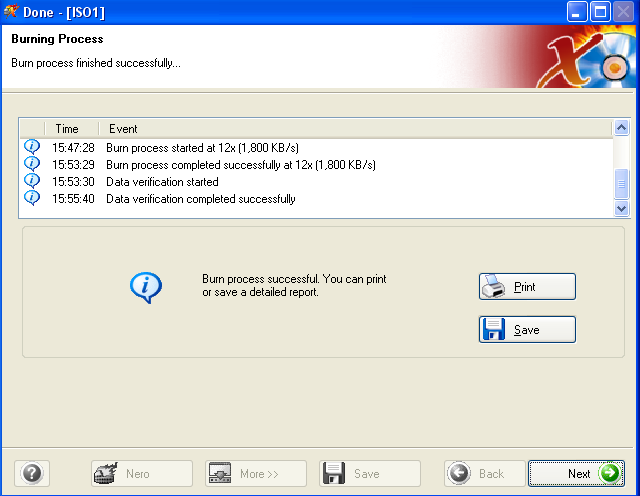
Wait whilst the disc burns…
If you managed to get all of your files onto one disc, you have now finished- but if you still have files to burn you’ll need to insert the next blank disc and repeat the process, this time selecting those files you originally missed out.
Store the discs in a safe, clean place- in a case if possible, to prevent them from being scratched.
This should be repeated for your Mods/Packages folder found at "Program Files\Electronic Arts\The Sims 3\"
Restoring Backed-Up Files
Restoring a backup (or transferring to another computer)
Restoring the backed-up files is really quite easy.
Warning: Please note that game files are not backward compatible with other expansion packs. If you made savegames with an expansion pack, they will NOT work without that expansion pack.
If you are restoring from a CD/ DVD
- Put the CD or DVD into the disc drive
- Click on ‘My Computer’
- Double click on the disc drive icon
- When the contents of the disc are displayed, take note of whether you actually saved the Sims 3 folder, or if you just saved the contents of the folder (Downloads, config, saved sims etc).
- Click Edit> Select all, and then Edit> Copy.
- Next, delete or move the contents of the My Documents\ Electronic Arts\ The Sims 3 folder. Your backup will be replacing these files.
- If you saved the actual Sims 3 folder, you can delete the folder too.
- Otherwise, keep the Sims 3 folder and right click on it and select Paste.
This should be repeated for your Mods/Packages folder found at "Program Files\Electronic Arts\The Sims 3\"
If you backed up the Sims 3 folder, just right click on the white space and click paste.
When the files have finished copying across, you’ll need to do the same with the second (and third!) discs, if you have them. Once you have finished, you should have in your documents folder a folder called EA Games, and a folder called The Sims 3 within that. Your restore is now complete.
If you are restoring from a Zip or Rar Archive
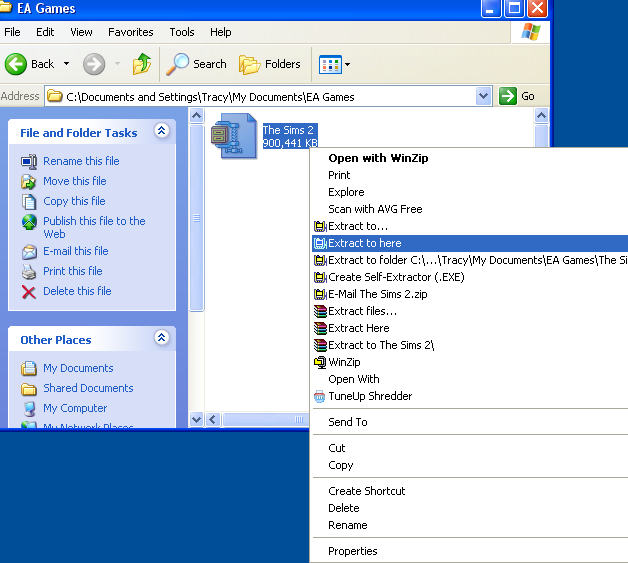
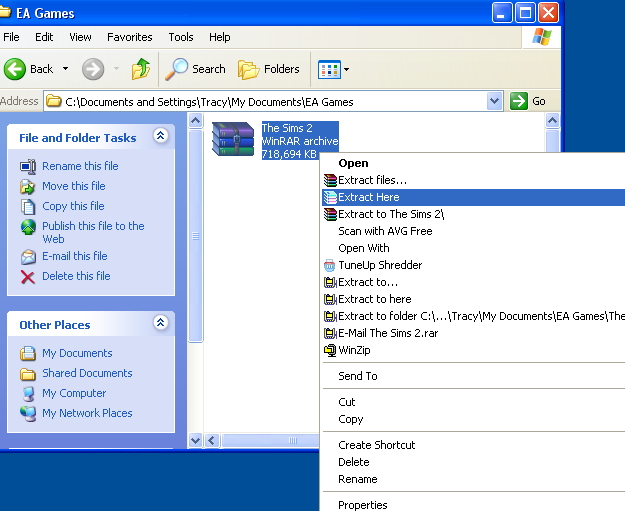
Copy and paste the Rar or Zip archive to My Documents\ EA Games.
For a Zip File, right click and select ‘Extract to Here’.
The files will be extracted, and you will end up with a folder called the Sims 3 within your Electronic Arts folder. You can then right click and delete the Zip file.
This was done using WinZip, if you use a different extraction program the process will be similar and the principle the same.
For a Rar File, right click and select ‘Extract Here’.
The files will be extracted, and you will end up with a folder called the Sims 3 within your Electronic Arts folder. You can then right click and delete the Rar file.
This was done using WinRar, if you use a different extraction program the process will be similar and the principle the same.
Credits
Thanks go to simsample, Bairy, and leighthesim for the original articles.
| Sims 3 Game Help Categories: | |
|---|---|
|
Custom Content | Installation | Gameplay Guides | Technical & Graphics Issues | Miscellaneous Issues | |
| MTS Help Q&A Forums | |
