Creator Guidelines: Meshes
Have you made a spiffy new object for your sims to use? Want to share it with everyone else? Here are the guidelines to make sure you get approved! This information is relevant for all of Buy Mode, much of Build Mode (pretty much everything not wallpaper, floors, and terrain paint), and also for neighborhood decorations.
Mesh Information
| Color Enabled and Subsets
|
- For objects, state whether it is colour-enabled (recolours properly). Very few objects should not be recolorable (foods, and fences), so please make sure that yours is. We have great tutorial for how to make objects CEP ready. Also consider giving your object two subsets, especially if the object has different materials like a wood chair with a cloth cushion.
|
| Catalog Location
|
- Let your downloaders know where they can find your object. For Build/Buy meshes, tell where your object will appear in the catalog, and whether or it's for residential, community, or both. If it's a neighborhood decoration, please also include which category it will appear in.
|
| Poly Count
|
- You must include full, numeric polygon (SimPE's 'facecount') for all meshes in your upload. Try to weigh the uniqueness and usability of your item against its poly count: creators that upload extremely high poly items that could be lower poly will be asked to reduce them or the items will be removed. Even if you just modify a Maxis mesh and don't add/remove anything, you still must list a numeric poly count. The rule of thumb is 800 polys per tile. However, if it's a simple object, the poly count should reflect that. Consider making smaller details part of the texture, and don't forget the power of bumpmaps! There is a tool in Milkshape called Direct X Mesh Tools which lowers poly counts, try it out. We also have an excellent guide about low poly modeling.
|
| Unique GUID and Script Numbers
|
|
All new meshes need to have a unique GUID number. You can register your own block of GUIDS at SimPE's website. You do not need to list the GUID for your object, but you do need one. If you do not give it a new number, it will overwrite whatever you cloned, which is bad. Some of the Build Mode items do not use GUIDs, instead they are installed with a unique script file. We have created a Modular Stair Number Repository for the modular stairs. Custom fireplaces should also be made with a scriptfile, but increasingly, they are created as a regular object and then put into the Buy Mode Appliances catalog. This is not the correct way of doing it. Numenor has instructions on how to use the Scriptorium on his thread.
|
| Mesh Problems
|
- Let the people know if there are unavoidable issues or weirdness with your object that downloaders should be aware of. Nobody's perfect, but you need to let your downloaders know if they're something odd to watch out for.
|
Textures
| Textures
|
- Make sure your mesh has a nice texture that showcases your hard work. The standard guidelines for recolours still apply to the textures you're uploading with your original mesh. Be sure to read through the object recolour guidelines.
|
Post Information
| Good title
|
| You'll need a good title for your upload which describes what it is, and interests people in downloading it.
Good titles:
- Mission-Style Living-Room Set
- 10 Simmer Way (Large family home)
- Fluffy Party Dresses
Bad titles:
- My First Upload!
- Lipstick
|
| Expansion Packs or Stuff Packs required?
|
| Particular items may be added with expansion or stuff packs, and depending on how your creation is made and the item you based it on, your creation may not work for users who do not own that expansion/stuff pack. You need to be sure of which packs are necessary for the items you have made. If users don't have the EP, your stuff may not work! If you are unsure of whether or not your creation will require an expansion or stuff pack, you can ask about it in the appropriate Create forum (under the Create menu on MTS) before uploading.
Make sure you only mark the EPs/SPs required that your upload actually needs! Don't just mark them all! For specifics, please read: MTS2:Creator_Guidelines/Compatibility
|
| T.O.U. (Terms of Use)
|
- Include clear terms of use for your mesh. What are your policies on user recolours, uploading your mesh elsewhere with lots, your textures, cloning, modifying your mesh, etc.? Make your terms of use clear but concise so there's no question on what you allow with your work.
|
| Proper Crediting
|
- If the mesh or textures you're using come from any other source except your own creativity (i.e. if any part of your creation wasn't made by you personally), you must list where you obtained the mesh or textures with enough information that it can be verified you are within the original creator's terms of use, or have obtained personal permission from them. This also applies to cloning from user-created objects. Give credit where it's due.
|
| Tools Used
|
- State in your post what tools you used to create the mesh (Unimesh, Meshtool, SimPE, Milkshape, Wings3D, UV Mapper, etc.): this both gives credit to the tool creators for their hard work in making your creation possible, and lets downloaders/recolourers know what the object will be capable of, like bump maps, proper animations, etc.
|
Screenshots
| Big Enough
|
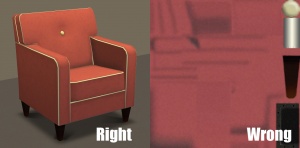
The larger your pics, the better! Tiny pics won't show enough detail to see what you've made.
- Minimum Size: 800 pixels wide by 600 pixels tall is a good size for the smallest pic you would want to upload. You may have smaller pics for thumbnails and the like, but for your required screenshots, please go as big as you can!
- Maximum Size: MTS allows pictures up to 2560 pixels wide by 1440 pixels tall, and a file size limit of 800 kbs - so you can have nice, big, pretty pics. You may have to resize your pictures or apply compression to get them to fit within that limit.
Please don't just take a small pic and size it up in your graphics program to get bigger pics - this only makes the dimensions larger but doesn't add any detail and just gives you a blurry, pixellated larger pic, not a nice clear one.
|
| In-game
|
| In order to see what your creation looks like in-game, we require in-game screenshots. Please no screenshots from your meshing program, modding program, pics of your textures, or anything like that. You must actually load the game and take your screenshots there.
|
| Well-lit
|
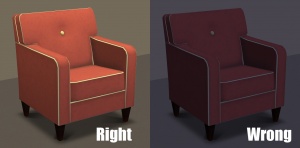
| Make sure you take your pictures during the daytime in bright sunlight, in a well-lit room, etc., - make sure your screenshots are nice and bright enough that people can see what you've made. Nighttime shots or those in a dark room really don't show off your creation very much.
At the same time, make sure you don't use too much light: if you put light-coloured item under a bright light, it can wash out and lose a lot of the detail of what you've made.
|
| Good angle
|
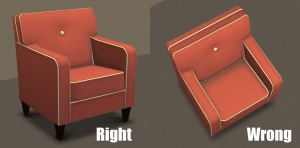
| Remember to take your screenshots at an angle that shows off what you've made. Screenshots taken from a "sim's eye view" generally work best, while pictures taken from a high overhead or "player's eye view" tend to not show your creation very well. Remember, you can always take multiple pictures to show your item from different angles.
|
| Close enough
|
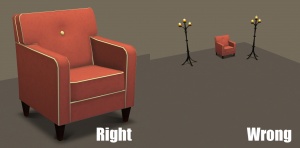
| Take your pics from close up! Don't take your pics from across the lot or far away - this won't show what you've made. Get nice and close, on the same level as a sim.
|
Additional Stuff
- If your upload is rejected or marked as changes required and you're not sure why, ask in Creator Issues.


