Tutorials:How To Link Custom Vehicles To Careers
| How to link Custom Vehicles to Careers | |
|---|---|
Base Game | |
| Author | whiterider |
Contents |
Overview
Note: This article will not teach you how to make a custom career, only how to use custom vehicles for your already made career. For tutorials on creating custom careers, click here.
So, you've created your beautifullly geeky Star Trek career but - oh noes! - that shabby yellow carpool just doesn't seem right for your budding adventurer. If only you could have them go to work in something else!
Well, you can. Here we will cover linking custom vehicles in the most ridiculous amount of detail possible: both for Maxis vehicles, and for custom vehicles.
What Do I Need?
- A pre-created custom career
- SimPE
- A vehicle you wish to use, and a level of your career you wish to link it to
Linking Maxis Vehicles
This is particularly simple if you use Bidou's Career Editor, so here we have instructions both with and without.
Using Bidou's Career Editor
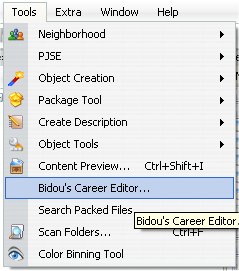
Under the Tools menu in SimPE, you will see Bidou's Career Editor. Open it.
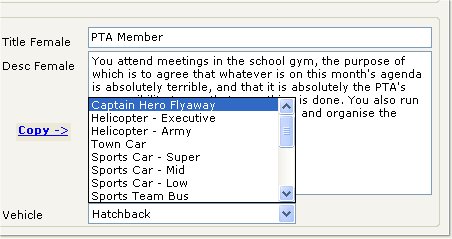
At the bottom of the first screen is a drop-down menu. Under this all the Maxis vehicles are listed. Pick your vehicle, and away you go. Now your Starfleet sims can be beamed up in the morning!
Simple as, you see.
Without Bidou's Career Editor
For some reason, vehicle GUIDs for careers are entered into SimPE in two parts: the second half of the GUID goes first, and the first half, second. So, for example, that shabby yellow car has GUID 0x0C85AE14, and is entered into SimPE as 0xAE14 followed by 0x0C85.
A list of Maxis carpools and their respective split GUIDs:
| Car | GUID Part 1 | GUID Part 2 |
|---|---|---|
| Ambulance | 0xB954 | 0x4D09 |
| Army Helicopter | 0xE058 | 0xAC43 |
| Army Truck | 0x3B80 | 0x4C41 |
| Black Stretch Limo | 0x110A | 0x6CA4 |
| Blue Sports Car | 0x0630 | 0xEC86 |
| "Captain Hero" Flyoff | 0xB49C | 0xAD0A |
| Grotty Yellow Hatchback | 0xAE14 | 0x0C85 |
| Mid-blue Estate Car | 0x451A | 0x4C03 |
| Police Car | 0x624E | 0xCD08 |
| Red Saloon | 0x4D9E | 0x8C5A |
| Red Sports Car | 0xFDA3 | 0xCC69 |
| White Bus | 0x2373 | 0x0CA4 |
| White Helicopter | 0x9B93 | 0x0D09 |
| White Limo | 0x487C | 0x4CA1 |
| Yellow Sports Car | 0xDEC6 | 0x6C6C |
Many thanks to Psion for this information.
OK, once you've chosen your vehicle and have its split GUID, it's time to open up your career in SimPE. In the Resource Tree (top left) select Behaviour Constant (BCON), and scroll down in the top right panel until you find Vehicle GUIDs.
You will now see a list of four-digit hex strings which look very much like your split vehicle GUIDs. Remembering that each career level has two lines assigned to it, find the lines that correspond to the level you wish to edit - basically, count in twos from the top. Do not count the first two lines, as they signify "unemployed" and are therefore irrelevant.
Once you have found the correct lines, enter your split GUIDs in the Hex box on the left, part 1 in the first line, part 2 in the second.
Tadaa! Done.
Linking Custom Vehicles
Now, you knew this bit wouldn't be as easy, didn't you? Well if you used Bidou's Editor to link your Maxis vehicles then the resounding answer is yes - custom vehicles are harder, because Bidou's Editor can't do them. You have to do it yourself.
There is a pre-requesite: Your custom vehicle must have been cloned from an existing EA carpool/NPC car. If the custom car you want to use is cloned from an ownable vehicle, you'll need to copy its meshes and textures over to a new clone of an NPC vehicle. If you skip this step, your carpool will try to park in your sims' driveway, and then become unselectable. Thanks to billielith and hexameter for this info.
So, first off, you need to find your custom vehicle's GUID. In keeping with my earlier Star Trek theme, I'm going to use a Shuttlecraft, downloaded long ago and by a creator long forgotten. If anyone happens to know who created the ownable NCC 74656 ShuttleCraft-Star Trek, please post in the talk for this page and I shall add credit.
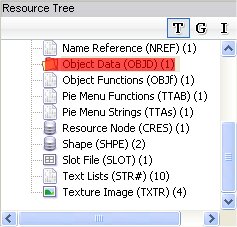
Open your chosen vehicle up in SimPE, scroll down in the Resource Tree until you find Object Data (OBJD).
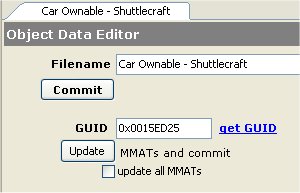
In the plugin view at the bottom of your screen, you will see a box marked GUID. Copy that number and paste it into a notepad document/write it down on a bit of paper.
Now you need to split it - remember the method from above? The last four digits form Part 1, and the first four are Part 2. So for my shuttlecraft, the GUID is 0x0015ED25, meaning that Part 1 is 0xED25 and Part 2 is 0x0015.
Now that you have your split GUID, you can enter it into SimPE as described above - open the Vehicle GUIDs Behaviour Constant, count the lines in twos ignoring the first two until you get to the level you want to change, and enter Part 1 into the first line and Part 2 into the second.
For the third and final time, Tadaa! Now have fun making your simmies go to work on horseback, on little pink bicyces, or on a sofa on wheels! (as created by Fresh-Prince) ;)


