Tutorials:3D Meshing Part IV
3D Meshing, Part IV: The UV Map
| 3D Meshing Part IV | |
|---|---|
| Author | WesHowe |
We will discuss UV Mapping and remapping a little more before moving onto more concepts. The pyramid we made before had a default UV Map, in which all the faces were on top of each other. we are going to learn how to use a seperate program to change that, and to get a coloring guide for using it.
While MilkShape has a built-in UV Mapper called the Texture Coordinate editor (in the Window menu) I am not very good with it, and haven't tried to use it in a long time. While I am currently using another program, I used to use a free one called UV Mapper Classic (0.26b). So go fetch that program, and come back and we will put it to use.
So, you installed the UV Mapper program, created a shortcut and read all the instructions. Well, if you didn't read the manual, you will know how to do a few basics soon, anyway.
The first thing we want to do is take out little pyramid and get it saved out so that it can be used by UV Mapper. But first, I want to simplify things a little. So use the edit/Selec None menuitem to clear everything, and on the main panel click on select and drag a small box around the top pixel of the pyramid and on the Vertex menu choose "Weld Together". This will make all the four vertices we snapped together a single vertex.
Then we get the results save by going to the File menu, select the Export submenu and then "Wavefront OBJ...". Save it to a file named pyramid.obj right in the same directory with your brick texture map.
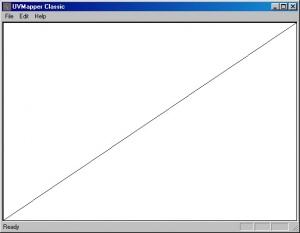
Check that your file got saved, and save your pyramid file in case you make a mistake (file/save as and name it pyramid.ms3d). Now, open up UV Mapper and then, using the File/Load Model menu find our pyramid.obj file and load it. When you are done, it should look like this:Now, the job we are going to do will be quick and dirty, but then you can redo it more leisurely on a more challenging project than a brick pyramid.
So, in UV Mapper we have the existing UV Map displayed, but all we see are two faces. Remember, we started with a cube and pinched the top together with the snap function. When we did this, the UV mapping didn't change, and MilkShape has all six sides of the cube laid on top of each other. We will use UV Mapper to sort these all out.
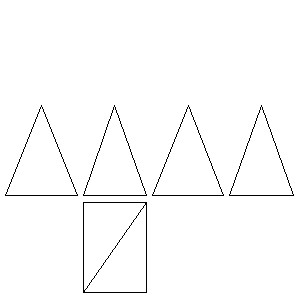
In UV Mapper, go to the Edit menu and pick New UV Map->Box. Use a size of 300 or so, check "Split Front/Back" and "Gaps in Map" And then click OK. It should now look like this:Now we are going to save the results in two forms, the OBJ file and a UV map we can color. Click on the Save Model menu and then make sure export Normals, Export UV Coordinates, export Materials and Export UV Mapper Regions are the selected items, click on OK and save it back to pyramid.obj.
Then use File->Save Texture Map and save a BMP file to pyramid.bmp. This file is one we can color on, and looks like what was on the screen.
Now, we will add some textures to the texture map file (pyramid.bmp). Load it up into your favorite graphics editor, and use the text functions and some color changes to make it look something like this:Now we can put all this together in MilkShape. Start it up, and then do a file/new. Go to the file menu and pick import/wavefront OBJ (as a side note, the original wavefront editor eventually merged and morphed into what is now Maya). Pick the pyramid.obj file and import it. You will see a pyramid, but the brick texture is missing.
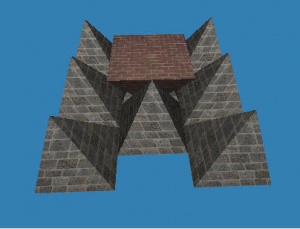
Instead of the brick texture, we are going to use the edited file we made with the numbers on it. Like the first time, go to Materials, create a new material, click on the file button and this time instead of the bricks choose the edited graphic. Then select the group, come back to materials and assign it. This is what you should see:
So in MilkShape you can move the perspective view around and see that each face has a number on it. The black lines are along the edges. Since we just used a small texture map, the zoomed in view looks pixelated. You can adjust this by choosing a larger texure map size, or using some of the other UV map features to expand some faces and shrink others.
Now, you can go back to the texture file with the numbers and edit it in you graphics program to put bricks on one face, blocks on another, marble or whatever you fancy on another, and so on.
This is all we need to do for even more complicated meshes, we just do more of the same. By following along, you now have an outline of how to get something static (non-animated) made. Later lessons will show how to see stuff you make in the game, at this stage we want to learn how to make things, and we have made a lot of progress.
Questions and Answers
Question -
TEXT
Answer - by Wes -


