Tutorial:Sims 3 Hair Basics
| Tutorials by Category | |
|---|---|
|
CAS | Patterns | Objects | Building | Worlds | Modding | Modding Reference |
Introduction
This is a VERY BASIC overview of how to make TS3 hair. It is NOT a full idiot's guide tutorial. Instead, it is is geared toward people who were already working on hair for TS2 and just want to convert their stuff or get started on making new stuff for TS3. It has no hand-holding and no big red arrows. It's complicated, it's hard, it's frustrating, and some things we just don't know enough about to tell you the right way to do it. But it's worth it in the end.
If the challenge doesn't scare you, read on. If it does... wait for other people to figure this stuff out and explain it better. ;)
Required Stuff
You need to get and install ALL of this before you start. There's a lot of it, but it's all fairly small.
Programs
- DABOOBS - For packaging up your hair mesh and making it unique.
- CTU - To grab one of the game's meshes to import so you have a basic skeleton, and to look at the game's original textures.
- SimPE - If you are converting a TS2 mesh to TS3.
- QADPE - To peek inside files you've already made to get the instances for existing DDS files, so you don't have to duplicate them for other ages/genders.
- Milkshape - You will need the 1.8.5 BETA version. Previous versions will not work!
Milkshape Plugins
These get put in your Program Files\MilkShape 3D 1.8.5\ folder
- Q-Mesh GEOM Plugin for Milkshape - To be able to import and export .simgeom files.
- msAlignNormals Plugin for Milkshape - To, um, align normals.
- Unimesh Plugin for Milkshape - For multi-weighting if you're doing a hair that's any longer than the back of the neck.
Other Stuffs
- .NET 3.5 - Required for DABOOBS, CTU, and QADPE. You need .NET 3.5, not 2.0 or any other version.
- Example Bodies and Faces - To use in scaling and aligning your mesh.
- DDS Plugins for Photoshop, GIMP, Paint Shop Pro, or whichever program you use to edit graphics - For creating and editing the textures you will need to make. Instructions are given for Photoshop CS3 - you may have to do some Googling for tutorials and tips on making it work in your program of choice.
The Tutorial
All images below can be clicked for a full-size version. Smaller sizes are provided to make this page load fast, and be easy to read.
Extract (For Converting - Optional)
If you're transferring a mesh from TS2 to TS3, you'll need to extract the mesh and textures first.
Extract Mesh
Open the mesh file in SimPE.
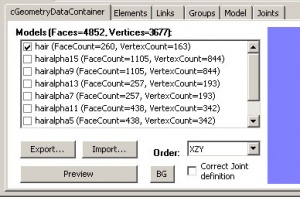
Click on GMDC in the Resource Tree over on the left. If there are multiples in the Resource List on the right, pick the adult one.
Tick all the little boxes beside the part names, and then click Export. Leave the file format as the default, .obj, and save it somewhere you can find it.
You can repeat this for other ages, if they're significantly different from the adult age (like a much shorter version for toddlers).
Extract Textures
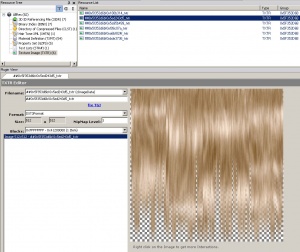
Open one of the texture files in SimPE. If there's a light blonde, white, or grey version, choose that over black or dark brown type colours, as you'll be converting the textures to look silvery white.Click on Texture Image in the Resource Tree over on the left, and then start looking through the list of textures in the Resource List on the right. Depending on the hair, there may be one, two, or more textures you'll need to export. When you find the ones you want, just click on the Export button and save the image(s) as a PNG file type. Call them something descriptive, and save them where you can find them.
Get a Base Mesh
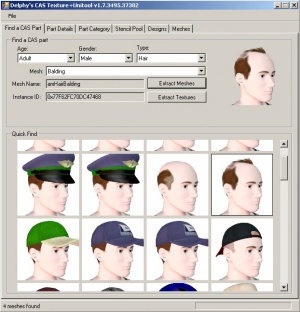
Run CTU. File - New. In the dropdowns, choose Age, Gender, and Hair. Choose the mesh you want to use as a base. DABOOBS only does hatless hairs so you'll need to choose a normal hair that doesn't have hair ties or hats or anything like that as your base. I usually use AMHairBalding as it's always worked without hassle - it does not matter if you use a different age/gender than what you're making!Choose Extract Meshes and save somewhere you can find them.
Edit in Milkshape
Now you need to either refit or make your mesh in Milkshape. Depending on the mesh, this can range from quite easy to extremely time consuming and complicated.
Getting Started
Run Milkshape. File>New. File>Import>Q-Mesh Sims 3 GEOM Importer.
Choose the LOD0 file you extracted with CTU (i.e. the .simgeom file that has LOD0 in its filename). You'll get a message about the default skeleton being used. Ignore it and click OK. You can hide the GEOM-00 group it'll import and ignore it up until the very end.
File>Import>Wavefront OBJ and choose the example face/scalp/body obj file appropriate to the age/gender you're creating for. Repeat for the other face/scalp/body parts if desired. This is just so you have something to use as a template to scale and align your hair with.
File>Import>Wavefront OBJ and choose the hair you're converting that you extracted with SimPE (if you're doing a conversion).
Editing Your Mesh
This part isn't going to be covered in depth, as this tutorial is not meant to be a full lesson in learning how to use Milkshape or how to do UV mapping, but a few key points and tips will be demonstrated.
If you are a complete Milkshape newbie, there's some editing tips over on the TS2 Unimesh 1 - New Mesh Basics tutorial, under the Milkshape editing part, which you may find helpful. There are also basic tutorials in the Milkshape help file, and to be found online if you Google.
A note on TS3 hairs: If you're familiar with TS2 hairs, you'll know they were multiple groups, and had a "hair" group that often functioned as a scalp or base layer of hair (covering the big hole in the head where the hair should go), with the other stuff layered on top as separate groups, with underside and front side separated. Each group could have its own independent texture and UV mapping. TS3 is quite different - there is always a scalp which is present in all hairs (you can't get rid of it but you can give it a hair texture) and all of the meshed-in hair parts are part of one single group, and thus must all share a single 1024x1024 texture (and the same UV map). Polygon counts seem to be roughly doubled overall - so instead of ~3000 polys being the upper limit for most normal TS2 hair, in TS3 it's around 6000. But of course, you should always strive to keep your poly count as low as possible and cut out unneeded polys and model things simpler whenever you can.
Remove Undersides
If you're doing a TS2 to TS3 conversion, you need to delete any duplicate groups that were the undersides of the hair. Usually, front sides and undersides are done in pairs - i.e. hairalpha3 and hairalpha5 as a pair (3 is the underside), hairalpha7 and hairalpha9 (7 is the underside) and so forth. However, this may not be the case in all hairs, so you'll want to hide and unhide individual groups to determine what's what before deleting anything.
Regroup Parts Separately
Some hair may be quite complicated - for example, a ponytail that has curls at the back as part of one group, plus tendrils around the face as part of the same group. By selecting the individual parts in face select mode with by vertex checked, you can then regroup them so you can edit them easily on their own.
Use Coloured Groups
It's a lot easier to see if different parts are poking through each other if you get them to show up in different colours. To do this, right-click in the 3D view and tick "Colored Groups."
Reshaping for Conversions
If you're doing a conversion, while the hair may be roughly in the right place, you'll need to do some editing to smush it around and get it to fit into place. The hairline should usually not start not right at where the scalp does, but about an inch lower on the forehead. You can always import an existing mesh (other than AMHairBalding) with a harline you like and use it as a guide for placement.
Reshaping is usually easiest done by taking the whole mesh and scaling up or down by a little bit, and moving it roughly into place. Then hide everything but the lowest layer, and shape it into place. Unhide the next layer up, shape it, and so on, until you've done the whole head.
Once you've got your mesh all nicely reshaped and the UV map edited, save a copy of it all still separated in MS3D format, so you've got it if you ever need to do a major edit.
Regroup All Together
Delete the face and scalp (don't touch the hidden GEOM-00) and select the rest of the groups (except GEOM-00) and regroup them into one single group.
Extra Data
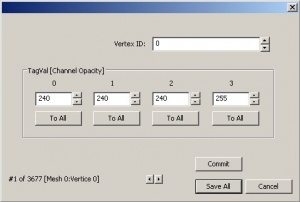
Now you need to assign this part of the mesh some extra data. This functions similar to material definitions in TS2, allowing you to shade certain parts of the hair lighter or darker for interesting effects. This also makes it so you can recolour the hair properly in game - without doing this, your whole hair can be just flat black.Here, we're only using the very basics of the Extra Data function, but you can do something much more interesting if you experiment with it, using smaller selections than the whole thing.
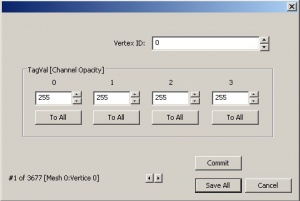
Select the whole regrouped-into-one part you've made, and then do Vertex>Sims 3 Extra Data Tool.
Fill in 255 in all the boxes and then click all 4 "To All" buttons and then finally Commit and Save All.
Underside
You need to also make an underside for your hair, since faces are only visible on one side.With your whole mesh still selected, duplicate the whole thing (you may not need to duplicate -everything- in some special cases, as things where you'd never see the underside can be left out). Then:
- Face>Reverse Vertex Order. This flips the duplicate inside out so it's facing the other way.
- Scale the whole thing by .999 (XYZ). This makes it so the vertices of the inside and outside aren't in exactly the same location; otherwise you'll get some very wonky display issues in-game.
- Vertex>Align Normals. This makes it so the faces aren't just black on the correct side.
- Vertex>Sims 3 Extra Data Tool again, and this time, put in 240 in the first three boxes, and 255 in the last box. Click all four To All boxes and then Commit and Save All. This will shade the underside just a bit darker than the main side, making it look a little shadowed.
Then you can regroup your front and back sides together, so you just have one single group (besides the still-hidden GEOM-00).
Bone Assignments
For short hair, you can merely flip over to the Joints tab, and with the whole hair selected, find the b__HeadNew__ bone (a little more than halfway down) and click Assign, to assign the entire hair 100% to the HeadNew bone. Quick and easy and works just fine - TS3 doesn't have issues with back of the neck gaps or sway in the breeze animations to worry about.
For longer hair - any longer than the back of the neck - you'll have to do a little more complex stuff when it comes to bone assignments. For this, you'll need the Sims 2 Unimesh tool (linked up in the needed stuffs) so that you can assign a single vertex to more than one bone.
Exactly which bones to assign to, and how much, depends on the type of hair you're doing, and the placement of the individual vertices. One of the best ways to learn about bone assignments is to look at existing hair meshes from the game that are shaped something like the hair you're making. You can select individual vertices or clusters of vertices to see what their assignments are set to, and use it as a guide for doing your own hair.
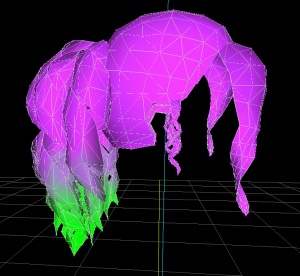
For basic assignments for a hair that rests on the shoulders, try something like:- Laying on the shoulders: 100% b__Spine2__ (4)
- Up a little bit from that, at the very bottom of the neck: 50% b__Spine2__ (4)/50% b__HeadNew__ (71)
- Up a little more, along the main part of the neck: 25% b__Spine2__ (4)/75% b__headNew__ (71)
- From the nape of the neck upwards, for the main part of the head: 100% b_HeadNew__ (71)
If you switch over to the Joints tab and tick "Draw vertices with bone colors" and turn off Colored Groups, you can see your assignments in a visual way, and you shouldn't see any harsh transitions between one colour and another - they should be a nice smooth blend from one to the other, like shown in the picture to the right. The image shows a smooth blend from Spine2 up to HeadNew - the same assignments recommended in the bulleted list.
![]() Tip: You can preview the way your hair will animate right in Milkshape, without having to go in-game. There's a tutorial available on MTS: Tutorial: Previewing animation in Milkshape by t2suggas - written with TS2 in mind but no reason it shouldn't also work for TS3. You can import an additional body mesh (exported with CTU) if you would like to see how the hair animates over a body. Just remember to delete the body when you're done.
Tip: You can preview the way your hair will animate right in Milkshape, without having to go in-game. There's a tutorial available on MTS: Tutorial: Previewing animation in Milkshape by t2suggas - written with TS2 in mind but no reason it shouldn't also work for TS3. You can import an additional body mesh (exported with CTU) if you would like to see how the hair animates over a body. Just remember to delete the body when you're done.
Copy Comments
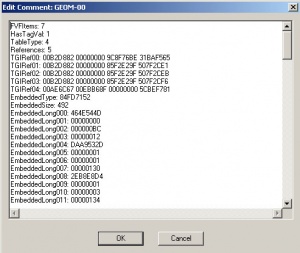
Once you have your extra data, normals, and bone assignments done, you're almost ready to export, but first, you need to transfer over the comments on the original mesh. Select the hidden GEOM-00 in the Groups tab and click Comment to view its comments. Click at the beginning of the first line and drag allllll the way down to the very end - it's long, but you need to select the whole thing. Then do CTRL-C to copy, and click Cancel to close the comments.Select your mesh, and click the Comments button. Your comments should be empty or blank - if they're not, remove anything currently there, and do CTRL-V to paste the comments you copied. Before closing this window, check to make sure your first line says "FVFItems: 7" - if it has any other number there, change it to 7. I'm not really sure what that does, but I know having it set to other numbers can cause weirdness, and 7 is safe.
Export LOD0
Delete the original GEOM-00 mesh from the Groups list. You should now have just one group left - the one with your hair.
File>Export>QMesh Sims 3 Geom Exporter and save your file with a descriptive name. Make sure to put LOD0 somewhere in the filename. I usually also save mine with a number, as I often end up going back and editing it. So, for example, "CurlTailAdult-LOD0-v1" is a good file name.
Make your LODS
Unfortunately, you're not done yet. Sims 3 uses not only a high detail version of the mesh, but also 3 lower detail versions used for the portrait picture, when detail settings are set low, and when zoomed out.
You might be able to get away with using the same mesh for LOD0 and LOD1 if you have a very low-poly mesh (like Maxis conversions from TS2 to TS3 - custom meshes are usually higher) but your other LODs need to be quite low. To see the poly count of your LOD0, select the whole thing in Face select mode, and do Tools>SelPolyCount.
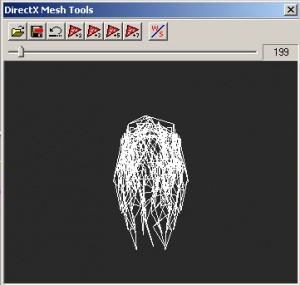
While you can remesh the whole thing from scratch with lower detail, there's a quick and dirty way of doing it that works okay... Tools>DirectX Mesh Tool.Drag the slider over to the left and you'll see how the number changes. That's your reduced poly count. Click the floppy disk icon to apply changes. It may look kind of ugly, but the only ones that really matter are the LOD0 (used in high detail) and LOD1 (used in low detail and in the portrait pictures) - the others are only used when zoomed WAY out so as long as the overall shape still resembles your hair, it's fine if they're kind of fug.
For LOD1, you'll want about half the count for LOD0. LOD2 should have about half of that, and LOD3 should have no more than about 250 polys.
Reduce your mesh into each of the 3 lower poly versions, and after each reduction, save the result as an OBJ file. Remember to save these with descriptive names so you know at a glance which is which.
Then, you'll need to do File>New and import your LOD0 (as you will have lost the skeleton in reducing). Open up the comments for GEOM-00 and copy them, then delete your GEOM-00. Import the OBJ for LOD1 (2, or 3) and then:
- Align Normals (it will have gone black when it was reduced)
- Redo the bone assignments (either with the Joints tab assigning it all to b__HeadNew__ or using Unimesh to do another smooth blend from b__Spine2__ to b__HeadNew__ or whatever)
- Reset the Extra Data (just fill in 255 for all, To All x4, Commit, Save All).
- Paste the comments again.
Then export as LOD1. Repeat for LOD2 and LOD3, making sure to do the normals, bone assignments, comments, and extra data after each.
Age Conversion
If you want to age convert your mesh to other ages, you should only really have to do meshes for child and/or toddler. Unlike TS2, you can not only use the same mesh for young adult through elder, but teen can also share the same mesh too.
To age convert, File>New, import your existing LOD0 and the child scalp/face and scale to fit, retaining the same normals/assignments/extra data, just changing the positioning and sizing. You can use the same skeleton and comments without any issues.
Repeat for all your LODs and save separately, making sure to name the exported files descriptively. Repeat again if you want to do it for toddlers too, again saving separately.
Gender Conversion
Female and males (teen through elder) can use the same mesh in some cases, but in others will need some reshaping done (a more feminine or masculine hairline, and adjusting for clipping) as well as pulling in hair at the back of the neck to fit a more shapely female head. You can do a gender refit the same basic way you'd do an age conversion - import your existing LOD as well as the example face/scalp/body and scale/reshape. Both genders of child and toddler can always use the same meshes for both genders.
Textures
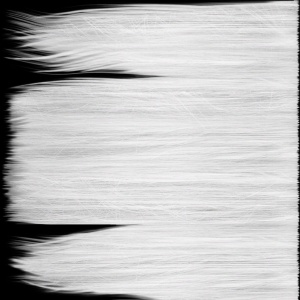
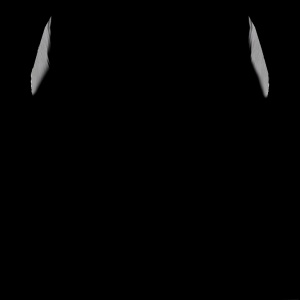
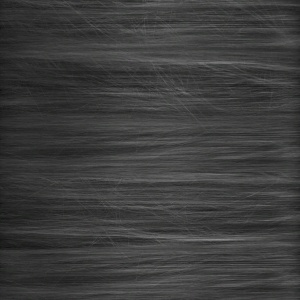
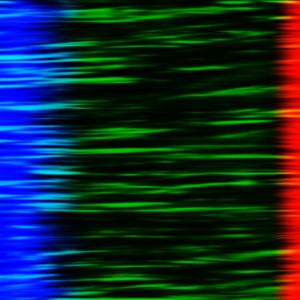
Because of the way TS3 hairs are constructed, you are basically limited to just a few textures per style. Below are examples from the game's textures, specifically the diffuse for afHairLongStraight. I've done the images here with the alpha overlaid on top as a multiply layer just to show you the overall shape of the hair - the actual texture doesn't look -quite- like this when you look at it in your image editor.
- Main: This will be the actual hair part - all the bits that you've meshed in.
- Scalp: A texture which overlays the basic scalp.
- Face: Optional - this can match up with the hair of the scalp texture around the edges for tendrils at the back of the neck, the start of sideburns, whatever.
Each of these (main, scalp, and face)consists of three parts:
- Diffuse: The actual texture itself. This should look like a light grey or white version of your texture - basically, how you would want the hair to work when set to pure white. The alpha channel on the diffuse (shown here as a black overlay for illustrative purposes) controls the cutout of strands so the hair doesn't just look solid.
- Specular: A dark grey, almost black, low-contrast version of your texture. This is the shine applied to it.
- Control: This controls the way the highlights, roots, and tips are applied to the hair via RGB channels. Red is roots, green is highlights, and blue is tips.
Additionally, you also have a bump map which can make the hair have a bit more 3D type detail, and a Halo, which seems to affect the way shine is applied overall to the hair. TBH, the bump map doesn't add a whole lot to the hair in most cases, and the Halo only seems to matter in CAS, so it doesn't make too much difference if you use a blank bump map set to fully grey, and use a halo from one of the game's hairs (I use the one from amHair Balding - more on that later).
The best way to learn how to do these separate textures (as I'm not going into detailed texture editing here - I'll try to do that in a later, more in-depth tutorial) is to look at some of the game's existing textures and see how they're done. You can also open up any of my hair files in S3PE or Postal and export the DDS files and see how I did them, as well. Make sure to open the Channels view in your program of choice (In Photoshop this is Windows>Channels) and examine the channels, especially for Bump Map, Control, and Diffuse - especially on the Control, it is -not- specifically the color red which controls the roots, but the red channel which does it.
Most files should be saved as a DDS in DXT3 format - don't save as DXT5 if you have an alpha as it will generally pixellate the edges more than DXT3. You may wish to save your control as an 8.8.8.8 ARGB Uncompressed - due to the way compression works you may lose a lot of detail on your blue channel, resulting in very pixellated tip colours in-game. Bump maps may be DXT5 with an alpha.
DABOOBS
Once you've got all your textures together, it's time to package it all up and see if it works in-game. For this, you'll need DABOOBS. Go ahead and run it.
Start
On the Start tab, type your name into the Creator Name box and click Start!
Step 2 - Mesh Name
Type a new, unique mesh name - the more unique, the better. "Hair" is not a good mesh name but "LongWavyFlippyEndsHP" or "ShortFluffyCurlsHP" are both good - long enough and complicated enough that it's unlikely anyone else will use the same name, plus your name or initials.
Step 3 - Age & Gender
Here's where you set the flags for your mesh. You'll be creating each mesh package separately, so even if you have mesh files for all ages and both genders ready, you need to do them one at a time based on who can share meshes. For example, you'd probably want to start with ticking teen, young adult, adult, and elder under Age, then Male under Gender, so you can make just the male one for the older ages, then come back later and do female, child, and toddler separately.
Under Category, tick everything except Singed and All unless you've got a good reason to do otherwise.
Under Extended Category, tick Valid for Random (if you want it to show up for random townies and NPCs) and Valid for Maternity (if you want it to work when sims are pregnant).
Step 4 - Mesh Files
Click the little ... box next to each of the LOD# boxes in turn, and select the mesh files you exported from Milkshape that correspond to the age and gender you're working on. This is when having labelled them clearly on export becomes important.
Step 5 - Texture Files
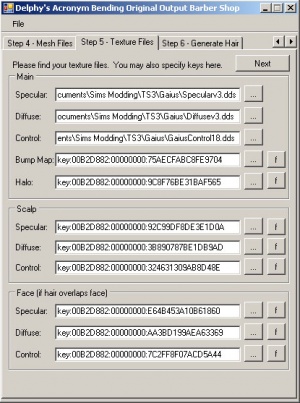
This is where it can get a bit complicated. As mentioned above in the textures section, you have three sets of textures (Main, Scalp, Face) and each of those has three textures of its own (Specular, Diffuse, and Control).You can, of course, make your own textures for all of those by looking at the game's textures to see how they're done and making your own textures in a similar way.
But you can really shave a lot off your file size by pointing to existing textures whenever possible - either those already in the game itself, or ones in packages you've already created. That second bit becomes essential when doing multiple ages, since you really don't want to duplicate all the same textures you've already used over and over for no reason, when you can just point at the ones in your first package.
For those items that you've made your own, just click the "..." button and tell it what you want it to use. You can, of course, mix and match - for my hairs I've mostly done my own diffuse/specular/control for the Main hair, and used the game's bump map, halo, and diffuse/specular/control for scalp and face.
The only spaces you can leave blank are for the face, if you don't want any face overlay at all. For everything else, you need to enter something - a key linking it to one of the game's textures, a key linking it to one of your textures already in another package, or the filename of a DDS file you want to use.
If you want to have it use an existing texture (yours or the game's), the input is:
key:00B2D882:00000000:5AC6E29A1785DFF3
... You just type that or similar into the box instead of choosing a file. That's Type, Group, and Instance of the resource you want to use. You only need to worry about changing the last bit, the Instance, to the instance of the DDS image you'd like to use for that item.
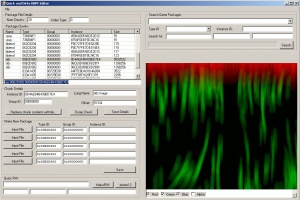
To find keys for existing textures in your own .package files using QADPE, first run QADPE, and then File>Open. Select the .package file you already created that has the textures you want to use. Scroll down in the list, looking in the Name column for "dds" - when you find the DDS files, click on the first one, and look at what it looks like in the preview window. You probably won't be able to see the whole thing, but you can usually see enough that you can tell what's what.Select the key text in the box below the listing, and CTRL-C to copy. Then switch back to DABOOBS and CTRL-V to paste the contents into the right box. Repeat for any other textures you would like to reference.
You can also do this using S3PE or Postal, but it doesn't automatically give you the nicely-formatted key like that - you'll have to copy-paste the instance onto the rest of the key yourself.
If you want to use a different one of the game's textures, copy-paste one of the keys listed in this thread, and chop off the end bit, after the last colon (:) so you would copy:
key:00B2D882:00000000:
Then find one of the game's textures you would like to use. CTU can extract textures for any of the game's hairs, and you can take a look at the filename. For example, amHairBalding_s_Fac_0x126aeb7825ffe1ca.dds is a file extracted with CTU and is, as you can tell by the filename (or opening the file and taking a look) the specular for the face overlay. Its instance is 0x126aeb7825ffe1ca - you would take off the 0x part if you wanted to use it as a key. Thus, it would become, in key form:
key:00B2D882:00000000:126aeb7825ffe1ca
![]() Hint: If you have the disk space available, it may be worth it to you to just extract all the game's textures at once, so you can flip through and find something that looks appropriate without having to extract one by one. It takes up about 4.5 gigabytes of hard drive space, but it's a lot easier to just scroll through DDS image thumbnails than to extract hairs one by one and have to open the images individually to see what's in them. I recommend the nVidia DDS Thumbnail Viewer to view the thumbnails, and S3PE to extract the textures. You'll want any resources with a type of 0x00B2D882 found in FullBuild2.package under Program Files\Electronic Arts\The Sims 3\GameData\Shared\Packages\ - alternately, you can extract all the textures with CTU to a folder, which will probably take up a lot less room.
Hint: If you have the disk space available, it may be worth it to you to just extract all the game's textures at once, so you can flip through and find something that looks appropriate without having to extract one by one. It takes up about 4.5 gigabytes of hard drive space, but it's a lot easier to just scroll through DDS image thumbnails than to extract hairs one by one and have to open the images individually to see what's in them. I recommend the nVidia DDS Thumbnail Viewer to view the thumbnails, and S3PE to extract the textures. You'll want any resources with a type of 0x00B2D882 found in FullBuild2.package under Program Files\Electronic Arts\The Sims 3\GameData\Shared\Packages\ - alternately, you can extract all the textures with CTU to a folder, which will probably take up a lot less room.
Useful Keys
You may find the following keys helpful:
Neutral bump map (for if you don't want any bump map):
key:00B2D882:00000000:75AECFABC8FE9704
Halo for AMHairBalding (good basic halo):
key:00B2D882:00000000:9C8F76BE31BAF565
Scalp for AMHairShortFeather (good basic scalp that covers the whole thing and matches up with face detail - works for teen through elder, both genders):
Specular:  key:00B2D882:00000000:92C99DF8DE3E1D0A
Diffuse: key:00B2D882:00000000:3B890787BE1DB9AD
Control:  key:00B2D882:00000000:324631309AB8D48E
Face for AMHairShortFeather (good basic light sideburns and back of the neck tendrils - works for teen through elder, both genders):
Specular:  key:00B2D882:00000000:E64B453A10B61860
Diffuse: key:00B2D882:00000000:AA3BD199AEA63369
Control:  key:00B2D882:00000000:7C2FF8F07ACD5A44
Scalp for CMHairShortCleanCut (good scalp for children, both genders):
Specular:  key:00B2D882:00000000:F7B9BE9886B5F828
Diffuse: key:00B2D882:00000000:8443DDCF3D15863F
Control:  key:00B2D882:00000000:BF21D8071180F0BC
Face for CMHairShortCleanCut (good face overlay for children, both genders):
Specular:  key:00B2D882:00000000:E2E91E3913B73EEA
Diffuse: key:00B2D882:00000000:E82198778B1ED5F7
Control:  key:00B2D882:00000000:29BFB36CB647DE2E
Scalp for PUHairScalp (good scalp for toddlers, both genders):
Specular:  key:00B2D882:00000000:BE9EDAC253A16E7
Diffuse: key:00B2D882:00000000:031152C3C770F730
Control:  key:00B2D882:00000000:0E7059B8F9908A23
Face for PUHairScalp (good face overlay for toddlers, both genders):
Specular:  key:00B2D882:00000000:7EDB84F4D7931D5F
Diffuse: key:00B2D882:00000000:D0ACC4782A6C4752
Control:  key:00B2D882:00000000:60C717C972A879FB
Step 6 - Generate Hair
Just click Generate! here, and choose a filename. Let it chew on your stuffs and when it's done, you'll have a new file!
Test
Go stick it in-game to test! You can save your project in DABOOBS to come back to later if you need to make changes. Then just flip to the appropriate tab and choose a new file to make any changes. Sometimes you'll need to tweak your mesh or textures, or adjust your LODs. It's MUCH easier to do with DABOOBS still open (or from a saved project) than to rebuild the info.
Other Versions
If you're doing other ages/genders, again, you can load your saved project in DABOOBS and just change the important info - usually the meshes used and maybe some of the texture files. Make sure to flip back to the Mesh Name tab and change the mesh name for other ages/genders!
Remember, don't duplicate your own textures - use S3PE or Postal to check the instances generated by DABOOBS in your existing files and input them as keys. You only need one file to hold your textures and the rest can depend on it.
Test Thoroughly!
Put your mesh in-game. Put it on a sim and move them into a lot. Zoom in and out wildly. Check their thumbnail and portrait on the UI. Go into Create a Sim or Change Appearance and test how the colours work. Look at it from every angle. Have your sim animate - look up, down, side to side. If you notice any major issues, go back to your files and change 'em! Everyone makes mistakes, but don't make crap!
Confused? Have questions?
Yes, we're all still confused at this point. Modding is still in its infancy and there's a lot we don't understand. You can post your questions directly relating to this tutorial on the MTS thread here:
Credit
Tutorial by HystericalParoxysm. Please do not repost elsewhere - this tutorial will be changed and updated as new information is available. Please contact HP on MTS regarding translation into other languages.
Related Links
| Tutorials by Category | |
|---|---|
|
CAS | Patterns | Objects | Building | Worlds | Modding | Modding Reference |

