Tutorials:TS3 HTMG SectG1 Main texture
From SimsWiki
| Texturing in Gimp | |
|---|---|
|
Main texture | Specular | PartMask | DropShadow | Overlay | |
G. Texture me beautiful
G1. Main texture
- save as a Gimp image with an .xcf extension so that we can store the layers; we will extract each area of this image so we can reuse and make changes
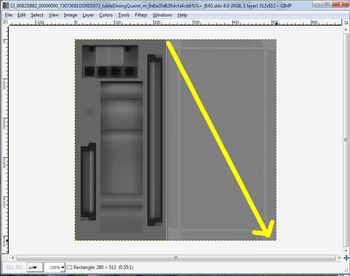
- make a selection using the Selection tool
 on the biggest rectangle area – designated for the table top
- click-drag in the direction shown
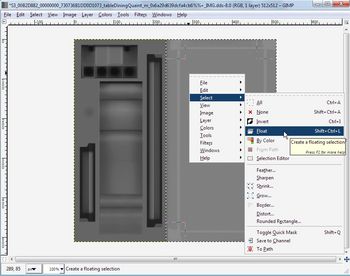
- right-click → Float
- in Layers Dialog, with the Floating Selection layer we just made still selected
- click New
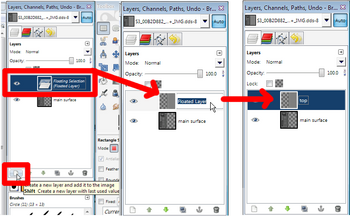
- double-click to edit name
- rename to "top"
-
- make sure to deselect everything by going to Select None from Select menu (or
SHIFT+CTRL+A)
-
- ensure we're on the "top" layer and Select All from the Select menu (or
CTRL+A). We shall now recolor the whole area to get rid of the bits for the table's original edges. We can reuse the color it had- click on the
 Color Picker Tool and then any area of the "top" layer,
- select the
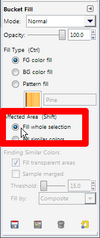
 BucketFill Tool
- in the BucketFill toolbox options, click on the radio button for Fill whole selection
- then click and fill the "top" layer
- click on the
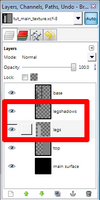
- click back to "main surface" layer and repeat to separate out the rest
- here I have done the legs and legshadows
- for this last bit of the table base, because it is non-contiguous, use the Free Select tool
- let's zoom in before we begin
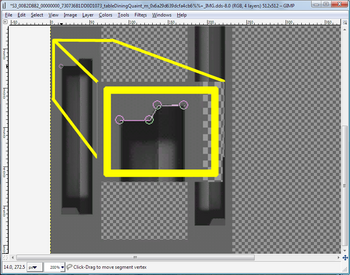
- click on one corner, and follow the shape's outline
- use
Backspaceto cancel the last segment,Escto start over - press
Spacebarto pan to another area if you zoom in too close, and move the mouse; we won't lose our selected segments - it is better to select slightly outside the line than to cut in into the area
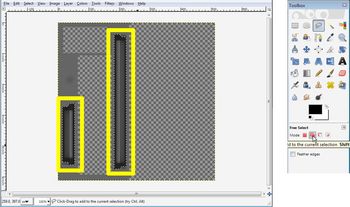
- bring it back around to the starting point and the last click will complete the selection and we have the "marching ants" to indicate we have a selection
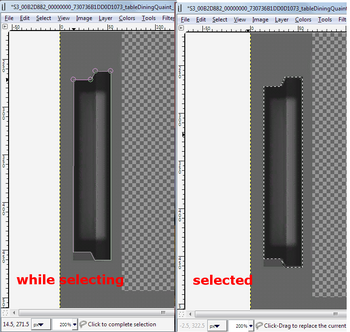
- to add to this selection and select the other side, click on the Add mode in the Toolbox options, and make your segments
- then repeat – float, new layer, rename (you can of course, select a simple rectangle, but this technique is great for precision when you do other projects with tiny grayscale parts)
-
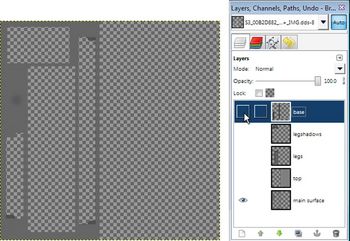
- if we hide the layers by clicking on the eye beside each layer's thumbnail, except for the "main surface" layer, then click back down to the "main surface" layer, we now have cutouts for those parts we floated and extracted.
- Select All from the Select menu (or
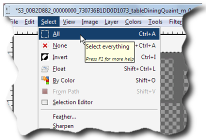
CTRL+A)
- verify that your foreground color is black in the Foreground/Background, if not click on the small symbol to reset it

- Fill with FG color from Edit menu to fill the whole area with black (or
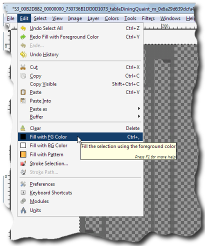
CTRL+,) or use the BucketFill Tool
-
- bring all the layers back to visibility and Select None from Select menu (or
SHIFT+CTRL+A)
- the final texture image. Save again. ALWAYS remember to do a Save before flattening– or you"ll lose all the hard work separating out the layers. We need the layers again to make more changes once the mesh and UV map steps are done. (you can of course try to UNDO but as they say, "shit happens")

- ms3d do not recognize .xcf file formats,
- pic – see (1) – no * before the filename means this file is saved. As long as saved as .xcf, you can undo Flatten but not when already saved as .jpg
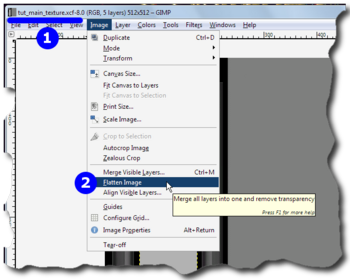
- from Image menu Flatten Image (if you forgot to do this, the Save As procedures will prompt you for it, anyway)
- When saving as dds for the final import into s3pe, ensure that the RGBA channels are still intact
- File menu → Save As
- just change the extension to jpg or png or dds (LithUnwrap does not recognize .png for texture files)
- click Save
- just accept the default values and click Save.
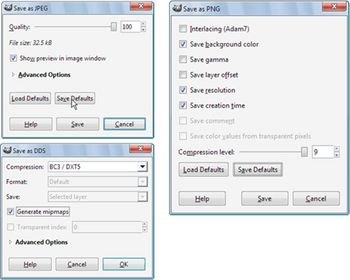
- you can save these settings as the Default by clicking
 so it will be chosen automatically from now on.
-


If you found this article useful, please remember to click 
Questions? Problems?
- If you encounter any problems with the steps outlined in this tutorial and need help, head on over to the Step-by-step Start-to-Finish HowTo mesh guide for TS3 thread to post your questions or
- If you need help in fixing your mesh, you may want to browse through our TS3 Meshing FAQs for some of the more common Meshing issues and their fixes or
- If none of the above links provided any help, you may want to browse through the threads in MTS' Meshing Forum or even start your own thread.
| |
|
TS3 HTMG SectG1 Main texture | |
|
| Texturing in Gimp | |
|---|---|
|
Main texture | Specular | PartMask | DropShadow | Overlay | |
| |
|
TS3 HTMG SectG1 Main texture | |
|