Difference between revisions of "Tutorials:TS3 HTMG ChapD Cloning"
| Line 90: | Line 90: | ||
{{Navigator|Tutorials:TS3_Basic_HowTo_Mesh_Guide|Tutorials:TS3_HTMG_ChapC_Staging|Tutorials:TS3_HTMG_ChapE_Extracting}} | {{Navigator|Tutorials:TS3_Basic_HowTo_Mesh_Guide|Tutorials:TS3_HTMG_ChapC_Staging|Tutorials:TS3_HTMG_ChapE_Extracting}} | ||
[[Category:so3c Tutorials]] | [[Category:so3c Tutorials]] | ||
| − | |||
[[Category:Sims 3 Modding Tutorials]] | [[Category:Sims 3 Modding Tutorials]] | ||
| + | [[Category:Sims 3 Meshing Tutorials]] | ||
| + | [[Category:Tutorials by ellacharm3d]] | ||
Latest revision as of 15:56, 17 September 2012
[edit] D. Cloning an Object
Clone the object from a base object in TS3 that is closest to the shape and functionality (scripts, slot placement, footprint size, behavior) of the new object you want to create.
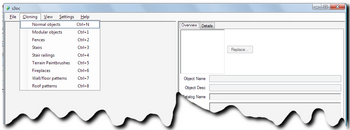
D1. Start s3oc. From Cloning menu, select Normal objects (or use keyboard shortcut CTRL+N).
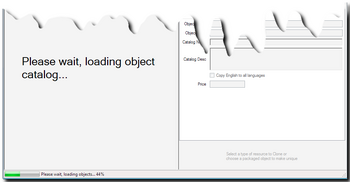
- Wait for s3oc to fully load the objects database.
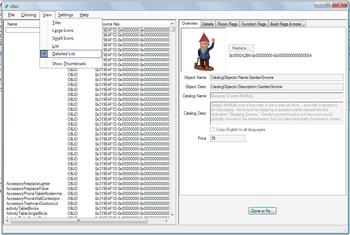
D2. When it is done loading, you're presented with the list in the Normal Objects category.
| You can view objects as a grid of thumbnails or as my setting here shows I’m viewing in “Detailed List” with thumbnails hidden |
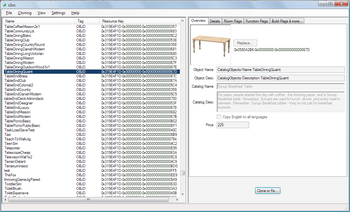
D3. Select the object you want to clone. For this tutorial, I chose this DiningTableQuaint.
| The list can be sorted by its name if you click on the Column Heading. |
D4. After we clicked the ![]() button, we will be prompted for some information.
button, we will be prompted for some information.
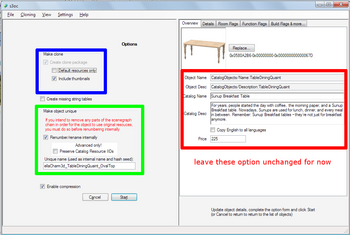
- We can leave the red-boxed area alone for now, as this information can be changed in s3pe or when we "Fix" the clone.
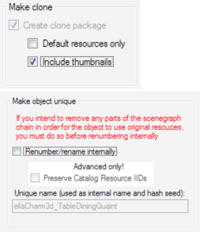
- For most cloning projects of regular inanimated objects, i.e. those that Sims have no interactions with, you only need to check the
 options and leave the
  unchecked, in the blue-boxed area.
- If you want to copy ALL the resources referenced by this object, then uncheck the Default resources only option. For most cases, thumbnails need not explicitly be replaced by any new .png file; I have done a few clones where the game generated the cloned object"s thumbnails without me doing anything specific. But this would necessitate the game re-generating the thumbnails again if the cache or thumbnails files are deleted from the user"s profile documents filepath.
- If you want to copy ALL the resources referenced by this object, then uncheck the Default resources only option. For most cases, thumbnails need not explicitly be replaced by any new .png file; I have done a few clones where the game generated the cloned object"s thumbnails without me doing anything specific. But this would necessitate the game re-generating the thumbnails again if the cache or thumbnails files are deleted from the user"s profile documents filepath.
- The green-boxed area is where you specify the package filename to be used in the mods/packages folder. You need to ensure the
 option is checked so the resources in the package file will be unique and not overwrite the game"s. Even if there"s another person using your creator name, the clone will still be unique unless that person created the clone at the exact same second!
- The
 will be check by default. Leave it checked.
- And then click
 .
.
- When you"re done, you get a confirmation window – click OK.
|
|
D5. If you uncheck ![]() , you cannot input a name (unless you had renamed before you unchecked).
, you cannot input a name (unless you had renamed before you unchecked).
- This, I believe, is by design – unchecking the Renumber/rename option means that the object you have cloned will not be unique and will become a default replacement. With the combination of these two options (Make clone and Make object unique) – this is the method I used to create a package of the original object for reference purposes.
D6. There isn't any need to do "Open (Fix)", unless you forget to check the
![]() option.
option.
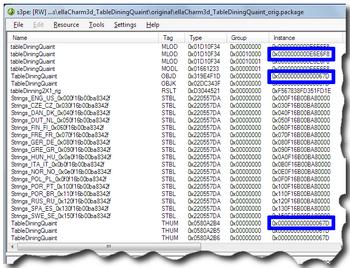
- It is easy to verify for this. All original game data have low value InstanceIDs. For example this package file needs to be "Fixed" before we can export any resources. We need to do this "Fixing" before making any changes to the resources because the resources have InstanceIDs as part of their filenames and import/export and decompile/recompile steps will be re-using the same filenames.
[edit] Questions? Problems?
- If you encounter any problems with the steps outlined in this tutorial and need help, head on over to the Step-by-step Start-to-Finish HowTo mesh guide for TS3 thread to post your questions or
- If you need help in fixing your mesh, you may want to browse through our TS3 Meshing FAQs for some of the more common Meshing issues and their fixes or
- If none of the above links provided any help, you may want to browse through the threads in MTS' Meshing Forum or even start your own thread.
| |
|
TS3 HTMG ChapD Cloning | |
|
