Difference between revisions of "MTS2:Creator Guidelines/Pets"
| Line 67: | Line 67: | ||
==Screenshots== | ==Screenshots== | ||
| − | + | {{Guidelines-Screenshots-Tips}} | |
| − | + | {{Guidelines-Screenshots-BigEnough}} | |
| − | + | ||
| − | + | ||
| − | + | ||
| − | + | ||
| − | + | ||
| − | + | ||
| − | + | ||
| − | + | ||
| − | + | ||
| − | + | ||
| − | + | ||
| − | + | ||
| − | + | ||
| − | + | ||
| − | + | ||
| − | + | ||
| − | + | ||
| − | + | ||
| − | + | ||
===In-Game=== | ===In-Game=== | ||
Revision as of 18:55, 22 May 2011
Contents |
Creator Guidelines - Pets
Uploading a pet to MTS? This guide will walk you through every step of what we require. Please make sure you read these guidelines carefully, as our standards have changed over the years, and there may be some items you weren't aware of before.
Quality
| Creativity |
|---|
|
| Weird Colors |
|---|
Special instances will be pets like as Dino, or a character pet (from a cartoon) that requires a strange colored fur will be accepted. But no green kitties and blue doggies please. |
| "Alien" Pets |
|---|
|
| Cartoon Pets |
|---|
|
| Other Animal Species |
|---|
|
Screenshots
| Screenshot tips |
|---|
| Camera Controls:
Take some time to just play around with the camera. It can take a while to get used to the camera controls, and even once you are experienced in their use, it may be challenging to get the shot you want with the constraints on the controls. If you haven't taken many sim pictures before, here is a list of camera controls:
Using Print Screen: If you have enough RAM to run Photoshop or another graphics editing program at the same time as TS2/TS3, you may want to take screenshots yourself, without the use of a program to store them for you. To do that, simply press the Print Screen or PrntScn key on your keyboard - it's usually off toward the right, over the arrow keys, above Insert and Delete. This will copy your current screen to your Windows clipboard, as if you had selected and copied it as an image. Then open any graphics editing program, create a new document the size of your monitor's resolution, and paste into that document. Your screenshot should appear in the document.
There are many programs available, free and pay, that will take screenshots for you by using a hotkey, and save them to a folder - just like The Sims 2 with the C key, but with options for much better quality settings. A quick Google search for 'free screenshot program' will also bring up many other options, which may have other features that are of interest to you.
Many simmers struggle with getting their images to be clear, crisp and under the maximum file size while keeping the image size larger than 800px by 600px. After getting your images from the in game camera or using a print screen program you will need to resize them and compress them into a jpeg image. Many graphics programs have a built in optimizing feature. Here are a few common ones: |
| Big Enough |
|---|
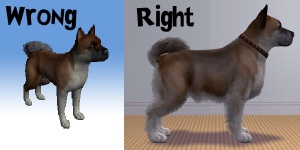
The larger your pics, the better! Tiny pics won't show enough detail to see what you've made.
Please don't just take a small pic and size it up in your graphics program to get bigger pics - this only makes the dimensions larger but doesn't add any detail and just gives you a blurry, pixellated larger pic, not a nice clear one. |
In-Game
All of your screenshots must be in-game. For pets, they may be in Create-a-Pet or on a lot. Please do NOT upload pictures which are not in-game, such as loading screen pictures, thumbnail images from the Create-a-Pet breed chooser, or the pictures generated when you upload a pet to the Sims 2 Exchange.
Close Enough
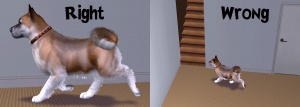
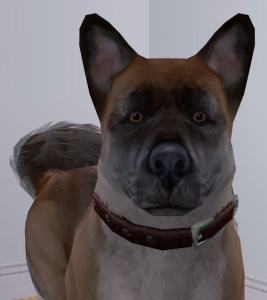
Make sure your screenshots are taken nice and close - your pet should fill up most of the picture, without a lot of space on the sides. Pictures taken close-up show your pet much better than ones taken from far away.
Enough Light
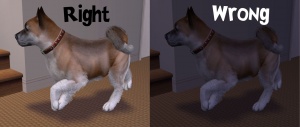
When taking screenshots, make sure you do it outside during the day, with your pet in the sun - or in a well-lit room. Pictures taken at night or in too dark a room will not really show off your pet.
Required Pics
For all pet uploads, we require:
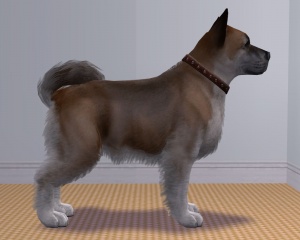
A full-body shot, showing your pet from the side nose-to-tail.
Inline/Attached Screenshots
Please do not post more than 4 inline screenshots (images that appear in the text of the thread). Having a lot of images that have to load on the thread makes browsing downloads very slow and can make the thread jump around as they keep loading.
You may host your inline screenshots elsewhere like Photobucket.com - however, these screenshots hosted elsewhere must be additional screenshots, and you must make sure to actually attach your required screenshots to the thread itself. If your Photobucket account runs out of bandwidth or you delete the pics, people still need to be able to get the required screenshots on your thread.
You can attach up to 8 screenshots to the thread itself, with the 4 additional inline screenshots hosted elsewhere (or attached) for a total of 12 possible screenshots. This should be plenty to show what you've made, even for fairly large sets. Remember, you can always collage several different images together into one image if you have a bunch of stuff to show off.
Packaging Your Pet
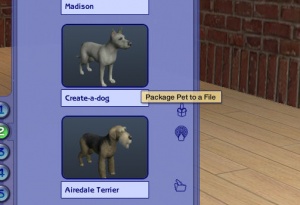
Packaging pets is done via the Create-a-pet screen in your game.
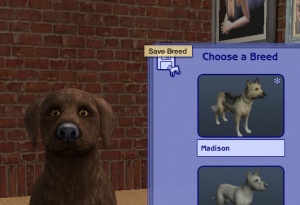
After you have finished creating your pet, you need to save the breed. You can do this using the icon shown here.
After packaging, pets will be saved to your My Documents\EA Games\Sims 2\Packaged Sims folder in a Sims2Pack format.
Born-In-Game Pets
If your pet has a litter of pups or kittens in game that are not created in Create a Pet, and you'd like to share one, it's super easy!
Load the lot with the pets you'd like to share. Have a sim pick up the phone and call the pet registry to register your breed. This will create that pet in Create a Pet's breed selection so you can now go in and package your pets born in-game.
Right Info/Right Files
ZIP or RAR
You will need to put your .sims2pack file(s) into a RAR or ZIP file to upload here. Please see here for instructions on doing so. Please do not include both a ZIP and RAR with the same contents - just choose one.
Please do not double-compress your files - you should not have a ZIP inside a ZIP or a RAR inside a RAR. This does not increase the compression, and it just makes an extra step for downloaders.
Upload in Sets
If you have created several pets in a similar style, different colours of a breed, etc., upload them all together in a set, all on one thread. This is easier for everyone: on our upload moderators, as they only have one thread to review rather than several... on you, as submitting a single thread is much quicker and easier than several... and on downloaders, as they can get everything they want all in one place rather than having to hunt around.
Good Title
You'll need a good title for your upload - something descriptive... like, "Akita Dog Breed" or "Persian Cat" - titles like "My first upload" are not good titles.
Good Description
You'll need to write up a little basic description of what your upload is... you don't have to get too fancy, but you do need to write something to get people interested. For instance, "This is an Akita, a Japanese dog breed known for its strength, loyalty, and gentleness with children." Something like, "This is my first upload... I don't know what to put here..." really doesn't make it sound like you've put any effort into it - and will reflect poorly on your creation. You don't have to write a novel, just something that makes it sound like it's worth taking a closer look at.
Checklist
This is a checklist of everything gone over above so you can be sure you've done everything you need to do to ensure your submission is correct. This is just for your own use - checking these boxes doesn't actually -do- anything, just is an easy way to keep yourself organized.
Quality
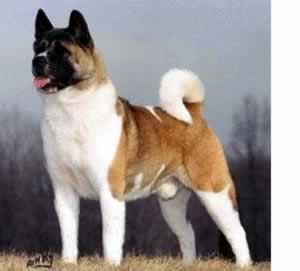
Creativity/Effort - You have spent a decent amount of time on your pet, creating a unique and interesting pet that not just anyone could make. If based on a real breed, your pet closely resembles the breed.
Weird Colours - Your pet is not a holiday themed pet or with unnaturally-coloured fur.
Alien Pets - If your pet is an "alien" species, it is a unique, unusual, and different alien species - not just a regular pet shape turned green.
Cartoon Pets - If your pet is based on a cartoon, anime, movie, etc. pet, there is a clear and obvious resemblance with the pet you've based yours on.
Other Animal Species - If your pet is meant to be something other than a cat or dog (like a bear, sheep, zebra, etc.), it closely resembles the animal it is meant to be.
Screenshots
Big Enough - Your screenshots are large enough to clearly see what you have made - limits are 1280x1024 pixels and 195 kbs.
In-Game - Your screenshots are taken from within the game, either on a lot or in Create-a-Pet.
Close Enough - Your screenshots are taken from close up, so your pet fills the image and can be clearly seen.
Enough Light - Screenshots taken outside are taken during daytime, with the pet in the sun - or screenshots taken inside have the lights on, and enough of them so your pet is clearly visible.
Required Pics - You have the required full body (nose to tail) picture, facial close-up picture, and if your pet is based on a real breed, animal, or something from a cartoon/movie/anime/etc., you have included a picture of the source animal for comparison purposses.
Inline/Attached Screenshots - Your inline screenshots are no more than 800x600 pixels, you don't have more than 4 of them, your required screenshots are actually attached to the thread, and you don't have more than 8 screenshots attached.
Right Info/Right Files
Right Files - Your files are .sims2pack files from your ''My Documents\EA Games\Sims 2\Packaged Sims'' folder.
ZIP or RAR - You have compressed your files into a zip or rar archive (but not both).
Upload in Sets - If you have created a set or several similar/related pets, you have uploaded them all together in one thread, rather than on separate threads.
Good Title - You have given your thread a good, descriptive title.
Good Description - You have given your thread a nice description that makes people want to download your pet.
