Tutorials:3D Meshing Part V
3D Meshing, Part V: Holy smoke, Joints!
| 3D Meshing Part V | |
|---|---|
| Author | WesHowe |
So far we learned the names of mesh components and how to make a shape and color it nicely. We are now going to make a different, simple model, put a couple of joints in it, and animate the object.
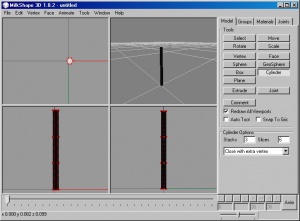
First, fire up MilkShape and start with a new file. First, we want a tube, so we will make one by clicking in the main panel on the Cylinder button. In the new options that appear under the buttons, choose Stacks 3, Slices 6 and then "Close with extra vertex".
Then click in either your front or one of the side views, and while holding the mouse button down drag the mouse and when the cylinder is shaped about like a pipe let the mouse button go. You should have something that looks like this:
So, now we need to do two things. One, the black looks ugly, and that is because MilkShape didn't make the normals point the right way. I think it is a bug, but easy to fix. Notice the red lines, which are showing that the pipe is selected (it was made selected). Go to the Face menu and pick Smooth All. This will create the normals and we should have a grey texture on the pipe now, still selected so the red lines will show (if they don't show, right click and choose wireframe overlay from the menu).
Now, we want to rename this entity as shaft. Click on the groups tab, see that Cylinder01 is highlighted, type "shaft" into the lower box to the right of the Rename button (not in the list) to replace "Cylinder01" and then click the Rename button. The list should change to "shaft".
We also want to position the pipe. Go to the edit menu and choose Select None. The red lines disappear. Go back to the groups tab, make sure shaft is highlighted and click on the select button. The red lines should reappear. While the shaft was already selected this time, use these two steps in the future to make sure that only what you want to work on is selected, or you may mess something you thought was already finished up and have to backtrack.
Now that the pipe is selected, we can move it. Click on the Model tab, and then on the button labeled Move. Then you can use the mouse and the top, left and front view windows to drag the pipe until it is centered over the origin, and the bottom is on the ground.
Next we will add a fulcrum to the top of the pipe We make it by clicking on the Sphere button in the Model panel, choosing Stacks 6, Slices 12, and clicking and dragging until we have made a ball about twice as big as the pipe. Then, like we did to position the pipe, make sure it is the only thing selected, pick Move, and drag it onto the top of the pipe. Place it so that the end of the pipe is buried inside the sphere.
We will combine these two. Select none, then in the groups panel first highlight "shaft" and click on select. Make sure the shaft gets selected. Then highlight Sphere01 and click on select. Both parts should be selected, and then click on Regroup. Both items on the list disappear and a new one appears named "Regroup01". This is now both parts combined into the same group. Use rename to change it's name back to "shaft".
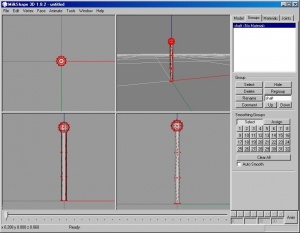
When you are done, it should look like this (an exact copy isn't critical):So now we want to add a moveable arm on the top. Make another pipe, a bit shorter than the first one but about the same diameter, but with the long dimension horizontal. Since it will probably come out vertical, while it is selected you can change to Rotate and click and drag until it is gorizontal. Then rename it to "arm", move it up and place one end into the ball.
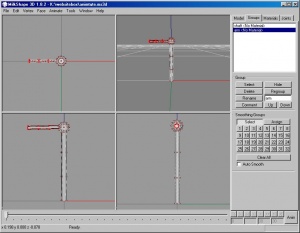
We will not be combining this arm with the other shaft. We can later, but it will be easier to set our joints and make our animation with them seperately grouped. The ball will make our movements later look smooth without seams appearing. You should have something like this now:
We can now add a couple of doobies, err joints to the mesh. We are really making a simple skeleton. The name joint is the place where we can move at (a slide or rotation point), while a bone is merely the line between one joint and the next. We tend to use the terms interchangeably, though, because if you move a joint, the bone will be moved too.
Go to the edit menu and select none, then click on the Joint button in the Model tab. Then click at the base of the shaft to make a joint appear at the origin (0, 0, 0). When the joint has been made, you should have a red (selected) ball there. If you don't see it, go to the Joints panel and make sure "Show Skeleton" is checked. If you get a really big ball, you need to go to preferences (in the File menu) and set the joint size (misc tab) smaller, I usually use 0.0075.
You can ensure that the joint is placed exactly by going back to the Model tab, choosing Move, make sure that 0.0 is in all three boxes in the options and that you have Absolute picked, then click on the lower move button. This is the way you can edit the placement.
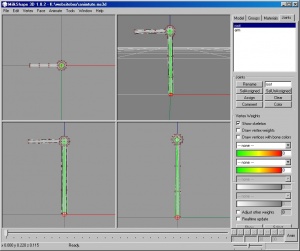
Go to the Joints panel again, make sure joint1 is highlighted, type "root" into the box and use Rename to change the name. When finished with this step, it should look like this:Now we will finish the skeleton, and take a break before we continue in another lesson with movements. Follow the steps in the order I show, because it matters.
First, select none again, and go to the Joints tab. In the windows, our red joint at the base should be blue, and nothing should be selected. On the panel is the list, with one item, root. Double-click on it to select that joint, it will turn red when selected.
We will now make another joint, which we want connected as a child of the root joint. The root joint will be called the parent joint. We want this because a child joint moves when the parent is moved, but you can move the child joint in other directions.
Now that we have the root joint selected, go to the Model tab and click on Joint again, and click in the middle of the ball we put on top of the first pipe. Some blue lines should appear running up the middle of the pipe, with a red ball inside our sphere. The red ball is the new joint, selected, and the blue lines are the bone part that is now associated with the root joint.
Make sure that the joint is well centered in the sphere by clicking on Move while the new joint is still selected, and dragging the joint into place with click and drag mouse movements. Using the absolute move is not any help now, and if you get real close it will be good enough.
After positioning the new joint, go to the joints panel, make sure that "joint2" is highlighted in the list, then rename the joint as "arm". Now, double-click on root. The ball at the root should turn red, and the bone and arm joint should be green. The red indicates that the root is selected, and the green parts indicate that these are child parts of the selected part and will be affected if the joint is moved. That's what we want.
Double-click on the arm joint, and the ball on top should turn red and the root joint and bone will be blue. This is showing us that the arm is the active joint and that the root joint is unselected, an important distinction.
Go to the tools menu now and find an item named Zero Joints. Use it to set the default joint rotation to zero. This will help if you want to edit and do some fancy, advanced stuff with the demo. Some games engines require zeroed joints, TS2 doesn't, but the animation exporter plugin doesn't handle joint rotations well enough.We will finish this lesson with the final step we need before we can animate the mesh, and that is the joint (or bone) assignments. In this step, we will be associating part of the mesh (the shaft) with the root joint, and another part (the arm) with the arm joint.
To do this, we start by doing a select none. You should learn that ctrl-shift-a is the keyboard shortcut for this, saves a lot of time. Then go to the Joints tab and double click on the root joint, checking that it tirns red. Then go to the groups tab, highlight shaft and click on select. All of the first pipe we made and the sphere on top should turn red.
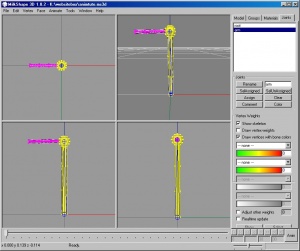
Go back to the Joints tab, root should be highlighted (because it is selected) and then click on Assign. Nothing visible happens. Select None. On the Joints panel, check the "Draw vertices with bone colors" item, and the shaft should turn yellow (or another color if the defaults were changed), while the arm stays grey.
If this is right, we have successfully assigned the shaft. Uncheck the vertices color box. Double click on the arm joint in the list, making sure it is selected. Go to the groups panel, highlight arm and click on select, then back to the joints panel and click on Assign. Select none again and check the vertices colors box again. The shaft should be yellow and the arm pink, showing us that they are assigned to different bones.
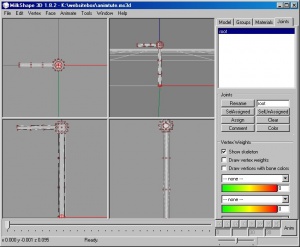
Select none, save the file and take a break with me. We will resume by animating our little crane-like toy. I have included a picture of what it should have looked like just beofre you did the last select none:
Questions and Answers
- Custom Sims3 Forums Visit Custom Sims3 Forums for Questions and Answers
