Difference between revisions of "Tutorials:STF Conversion Tute Step 10"
(→Import your TS3 MLOD-00000 Mesh part) |
(→Import your TS3 MLOD-00000 Mesh part) |
||
| Line 54: | Line 54: | ||
:2. Scroll way down and select '''Sims3 Object Import V1.00''' by ''Wesley Howe'' | :2. Scroll way down and select '''Sims3 Object Import V1.00''' by ''Wesley Howe'' | ||
| − | + | <br clear="all" \> | |
| + | [[File:mesh-MLOD-00000.jpg|thumb|alt=Alt text|mesh MLOD-00000]] | ||
:4. Import your TS3 mesh part first - | :4. Import your TS3 mesh part first - | ||
* Navigate to your working folder(DragonTree)|'''MLOD-00000''' folder | * Navigate to your working folder(DragonTree)|'''MLOD-00000''' folder | ||
| − | * Open the '''*MLOD_filebase.s3asc''' file | + | * Open the '''*MLOD_filebase.s3asc''' file (you will see the TS3 topiary) |
Revision as of 19:24, 10 February 2011
Contents |
Step 10: Using Milkshape to Swap Mesh Parts
TS3 Has 4 Mesh Parts
Milkshape is used to swap the TS2 mesh parts into the TS3 mesh and to get the UV map. There are 4 parts to a TS3 object mesh, one for high detail and one for low detail plus a sunshadow to match each respectively. When you edit the mesh you need to create a new low poly version to use as your sunshadow so that if used outdoors it will cast the proper shadow. Your working MLKOD/MODL folders are needed to keep the decompiled mesh parts separate from each other.
- MLOD 00000001 High detail mesh
- MLOD 10000001 High detail sunshadow
- MODL 00000001 Low detail mesh
- MLOD 10000001 Low detail sunshadow
In Milkshape, if you ever want to know which parts are which, simply select the group name and then the select button. The selected group part will display itself in red. Clicking the select button again, deselects the group.
Prep Milkshape
- Open Milkshape -
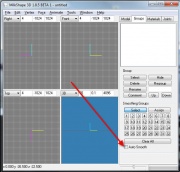
- Make sure Auto Smooth is NOT selected!
Joints
Milkshape by default has 4 viewing windows which view your mesh from different directions. You can easily change the view directions by clicking the drop down boxes and changing your view.
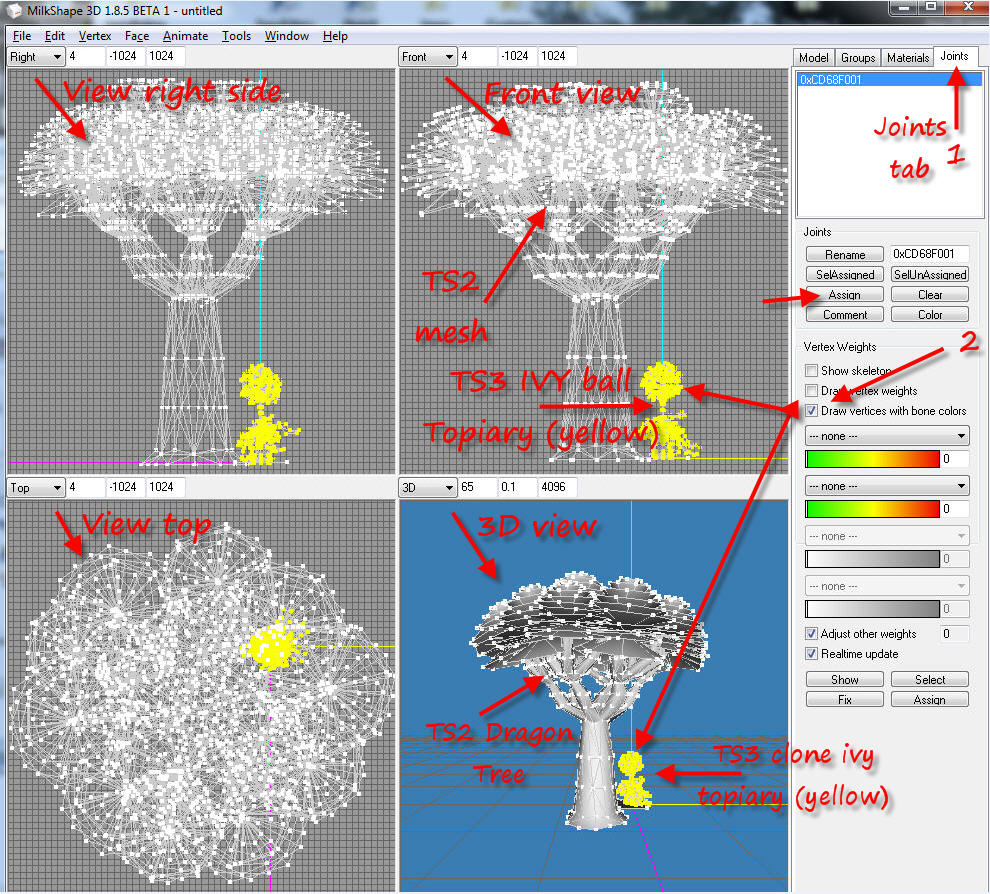
For this tutorial, I've set Milkshape up for Right, Front, Top and 3D.
The TS2 dragon mesh is the large tree and the TS3 ivy topiary is the little yellow mesh. The yellow tells you that the vertices have joint/bone assignments.
Set up Milkshape to automatically make selected bones assignments and/or joints visible. To make bone assignment colors visible:
- Click the Joints tab
- Select Draw vertices with bone colors.
.
Import your TS3 MLOD-00000 Mesh part
- 1. Click File and Import
- 2. Scroll way down and select Sims3 Object Import V1.00 by Wesley Howe
- 4. Import your TS3 mesh part first -
- Navigate to your working folder(DragonTree)|MLOD-00000 folder
- Open the *MLOD_filebase.s3asc file (you will see the TS3 topiary)
5: Import the TS2 object you want to convert. - Click File|import|wavefront OBJ,
 1: Navigate to the TS2 Object file
 2: Select it
 3: Click Open  (This brings in the TS2 Dragon tree )
6: You'll now see 2 items in the windows. The the bone assignment colors need to be visible so if you haven't activated the colors yet, click the Joints tab and select Draw vertices with bone colors. (joints.jpg)
7: Note that the TS3 ivyballtopiary is yellow which means it has a bone/joint assignment. The large Dragon tree does not. the Dragon tree is also not in the same location as the TS3 mesh part so you need to move it as well as assign the bone parts.
a: Click the Groups tab. Note that in this case, there are 2 TS3 mesh groups - Group00 (shadow) and group01 (mesh) and one TS2 mesh group called foilage. YOu need to keep the TS3 groups in the same order while you swap the mesh parts out. If you mix them up, your TS3 mesh will do strange things like disappear or have weird shadows showing.
 b: Click on Foilage
 c: CLick Select (The TS2 mesh should turn red) (select-foilage.jpg)
 d: Click the Joints tab and click the Assign button - both mesh parts turn red
e: Now you need to move the TS3 mesh over the TS2 mesh. Click the Model tab and then the Move button - Position the dragon tree exactly over the TS3 topiary. The bottom-center of the mesh bases are where they need to coincide. (move.jpg)
f: Click the Groups tab - the foilage group should still be selected. Click the Select button to deselect the dragon tree. (The red goes away but the meshes will remain yellow)
 g: Now we will swap the TS2 Dragon Tree mesh into the TS3 mesh group01 - Copy the TS3 group01 name before you remove the topiary. -
    1: Click group01,
    2: In the Rename box, select Group01 and then "CTRL" and "C" to copy the group name.
    3: Click Select (topiary will display red)
    4: Click Delete to remove the TS3 topiary
    5: Select foilage in the group box.
    6: Click the select button
    7: IN the Rename box, Highlight foilage and click CTRL and V to paste Group01 to overwrite foilage.
    8: NOw you need to give the TS2 mesh the same name the TS3 mesh had - CLick the RENAME button to assign group01 to foilage group. (foilage will disappear and be renamed group01 which is what we want.)
 h:  Get the UV map. You only need the UV map from the main MODL-00000 mesh part.  This step is not needed for the other MLOD/MODL mesh parts.
    1: Click the Groups tab
    2: Select groups01 and click Select
    3: Click the Materials tab
    4: Click New
    5: Click the upper None button
    6: We know this mesh is 512 x 512 becasuse we got that size when we exported the TS2 mesh. Navigate to your 512x512 blue checked template pattern and select it then click the Open button.
    7: Click the Assign button
    8: Along the top click Window and select Texture Coordinate Editor.
    9: The scale should be 1.0
    10: Use your capture utility to grab the 512x512 UV map and put it in yout working folder's IMG folder.
    11: Close the texture coordinate editor.
 h: Resize the shadow base so it is an appropriate size for the dragon tree. On the Groups tab, select group00 (shadow)
      1: Click the Model tab
      2: Click the Scale button
      3: Change the X and Z values to 1.5
      4: Click the Scale button to the right of the xyz boxes a few times until the shadow base is big enough for the new mesh's shadow (5) (scale.jpg)

f: We are finished with this part of the mesh. Click file - Export - scroll down and select "Sims3 Object Export V1.00 by wesley Howe"
 g: Navigate to the MLOD-00000 folder and select the *MLOD_filebase.s3asc file to overwrite it and click Save.
 h: When it tells you the "Bone assignments are missing. Proceed?"  Click Yes.  (The shadow group00 doesn't have bone assignments.)
i: CLick File and New and Don't save to clear Milkshape for the next mesh part.
 j: Follow the same steps for the remaining mesh parts. Except you don't have bone assignments for MLOD-00001 and MLOD-10001 but you do have bone assignments for MODL-00001. You don't need the UV map for the remaing parts.
   1: MLOD-00001 - no bone assignments - 1 mesh group - group00
   2: MLOD-10001 - no bone assignments - 1 mesh group - group00
   3: MODL-00001 - Has bone assignments - 1 mesh group - group00
k: When you are done swapping the TS2 mesh into the 4 TS3 mesh parts, close Milkshape.


