Tutorials:Sims 3 Custom Patterns/Single Colour Patterns
Contents |
Single Colour Patterns
The easiest pattern type is a single-colour such as a wood or textural fabric that you only want to have one colour palette option for.
Source Image
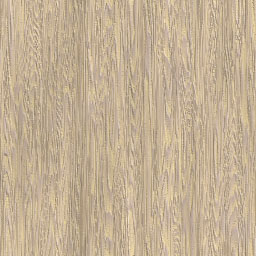
For my example, I will be using a wood texture that I generated using the very cool (and free) program, Wood Workshop. It's automatically seamless, and thus will be really easy to convert.
Make Seamless & Resize
If your image is not already seamless, then now is the time to convert it to seamlessness. See: Tutorials:Seamless Textures for instructions.
Once your image is seamless, resize it to 256x256, the size used by the game's patterns. If you're using Photoshop, make sure to change your resize type to Bilinear for best results.
Examine Channels
Open up your seamless image in your graphics editing program.Then bring up the Channels window. In Photoshop, this can be done by the Window menu -> Channels.
You can see here how my image has separate channels. RGB shows all three channels together and is the full image as you normally see it. You can also click on each of the separate channels in the list (red, green, and blue) and see them individually. They will usually look like varying greyscale versions of the same image.
That's the wood image, imported straight into game with no changes. And while it doesn't look horribly crappy, it doesn't look great either. That's with the colour set to fully white. It should be nice and bright white, but instead it's very washed out and grey, with no areas that are nice and white. And changed to dark, it loses detail very fast, becoming dull and uninteresting.
Adjust Red Channel
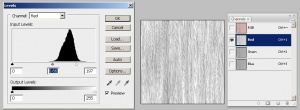
So the image has to be adjusted. Select the Red channel in the channels window.Then, bring up the Levels adjuster. In Photoshop, this is Image - Adjustments - Levels. Pull the sliders in the top area around and get a feel for how the tool works. Generally you want both sliders to be somewhere within the large chunk of black.
The idea here is to create greater contrast, so that there is some pure white and that most of the image is fairly light, but also lots of midtones and some dark areas too. Try to adjust it so that it looks like you would want in-game if the colour was set to fully white.
You can also try using the Brightness/Contrast adjustment (In Photoshop, Image - Adjustments - Brightness/Contrast) instead of Levels. It all depends on your individual image and how you would like it to turn out.
You only need to do this for one channel if you're doing a single-colour pattern. While there is still stuff in the green and blue channels, we can basically ignore it (since the game will too).
Save
Single colour patterns are pretty easy - you mainly just need to adjust things, and then it's time to save! Drop down to Saving Your DDS for info on how best to do that. If you want to create a dirt layer (so people can easily make your texture look dirty or grungy) then drop down to Dirt Layers and do that before saving.


